

Setting up SAML-based single sign-on for Microsoft Entra ID
Configure SAML-based single sign-on between Kissflow and Microsoft Entra ID by exchanging metadata files and mapping the identity provider settings.
Setting up SAML-based single sign-on for Microsoft Entra ID
SAML (Security Assertion Markup Language) lets your users sign in to Kissflow with the same credentials they already use for Microsoft Entra ID, instead of managing a separate Kissflow password. Setting it up is a back-and-forth exchange of metadata files between Kissflow and Entra ID.
Note
You need to be a Super Admin or an IAM Admin to access Account security and set up SAML-based SSO.
Download the metadata file from Kissflow
-
Go to Account Administration > Account settings > Account security.
-
Beside Sign in with SAML, click Configure SAML.
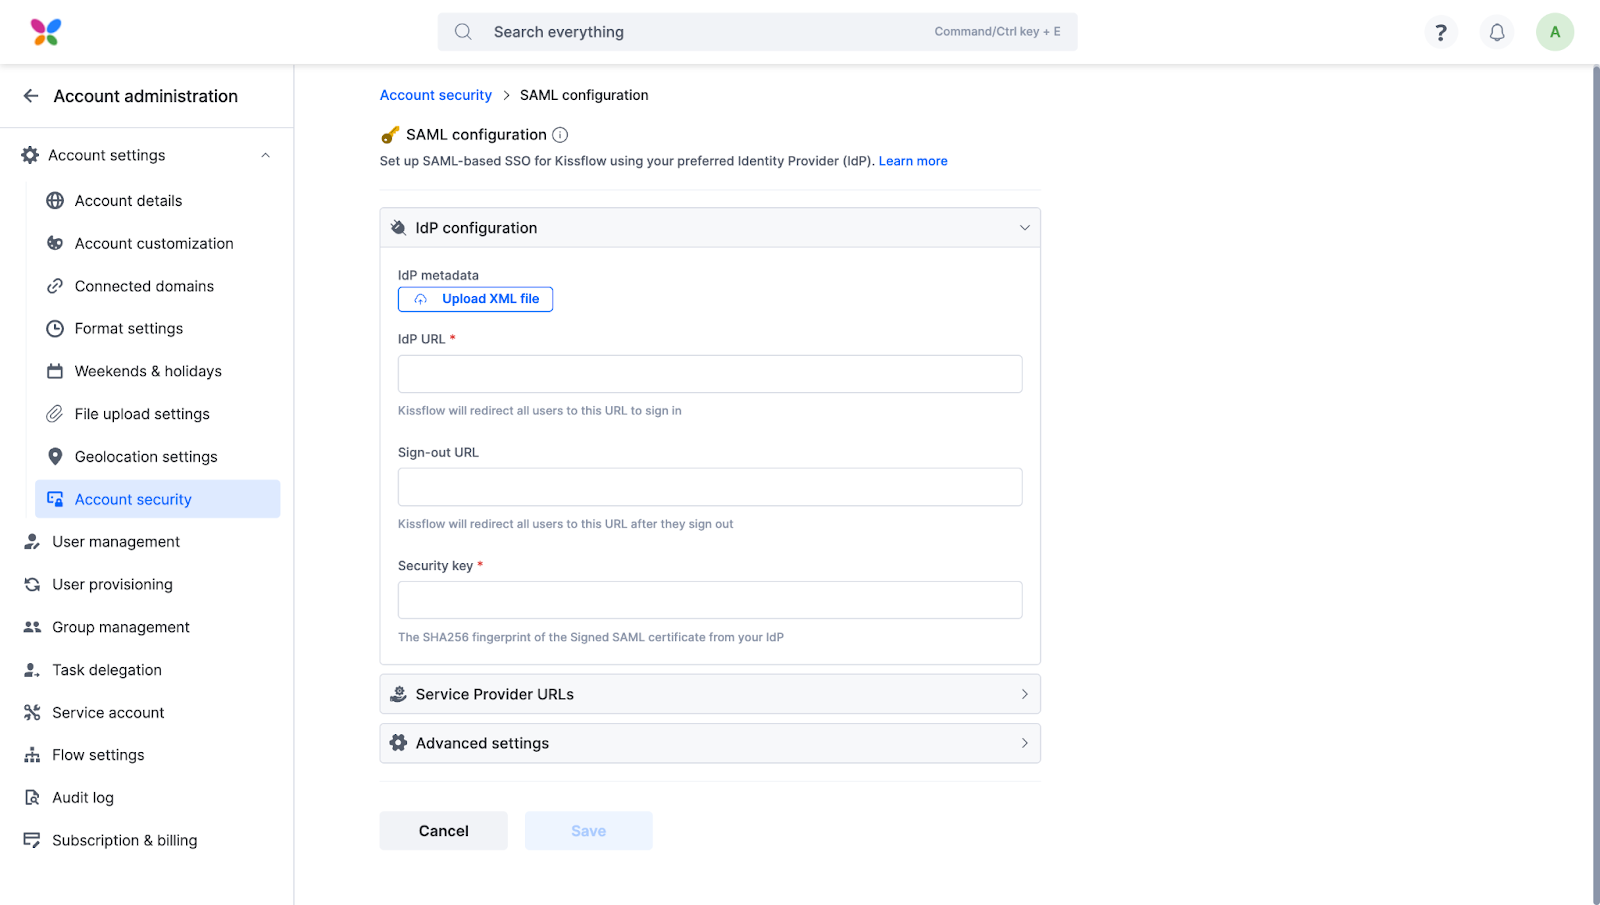
-
Under Service Provider URLs, click Download metadata.
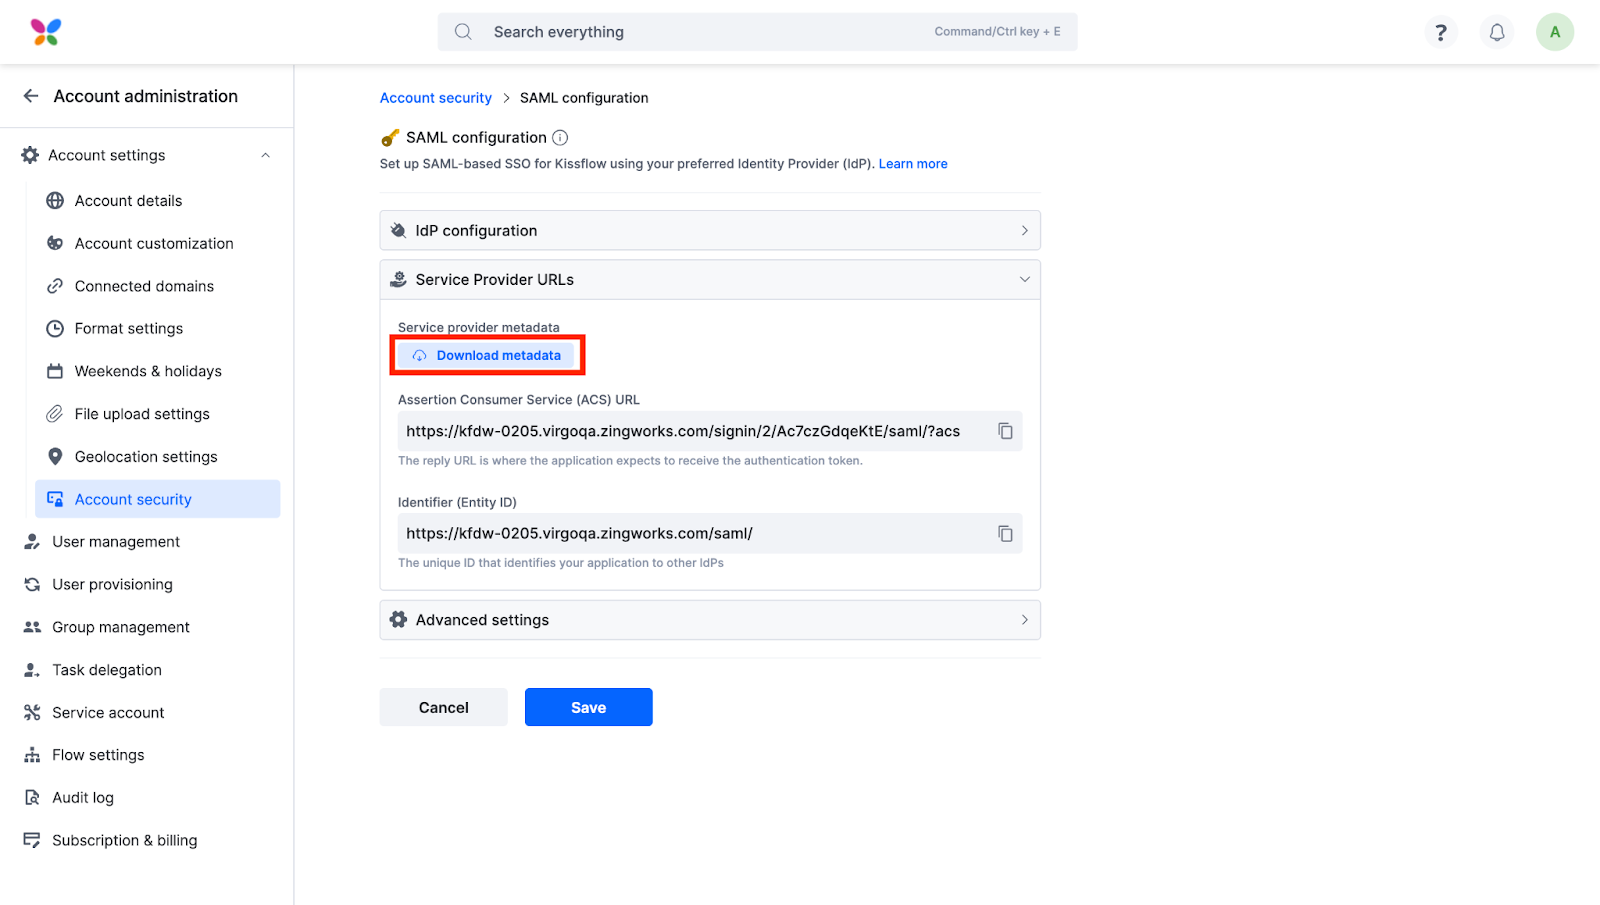
This downloads a metadata file that identifies Kissflow as the service provider. You'll upload it to Entra ID in the next step.
Create the application in Entra ID
-
Sign in to your Microsoft Entra ID account and go to your homepage to create a new application.
-
Name the application, then select Integrate any other application you don't find in the gallery (Non-gallery).
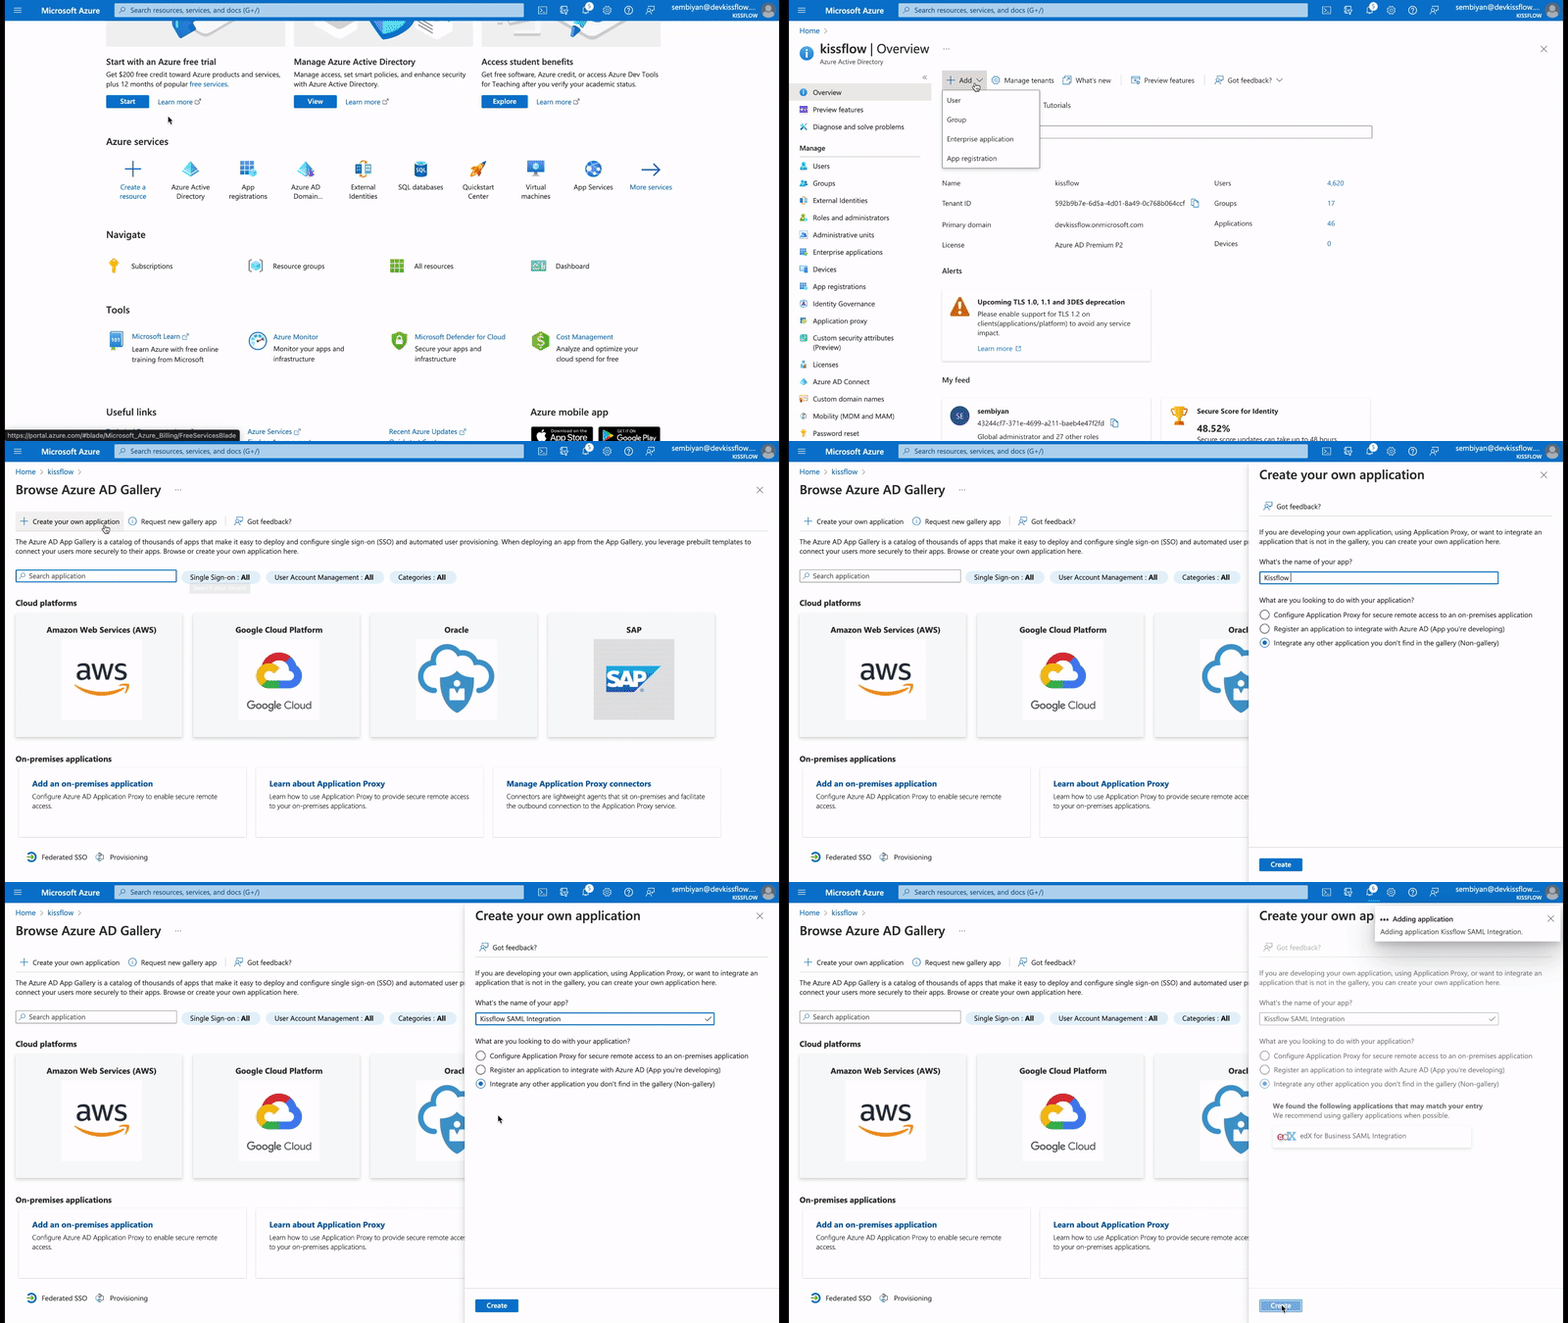
-
Set up single sign-on using SAML, then click Upload metadata file and select the metadata file you downloaded from Kissflow.
-
Click Save.
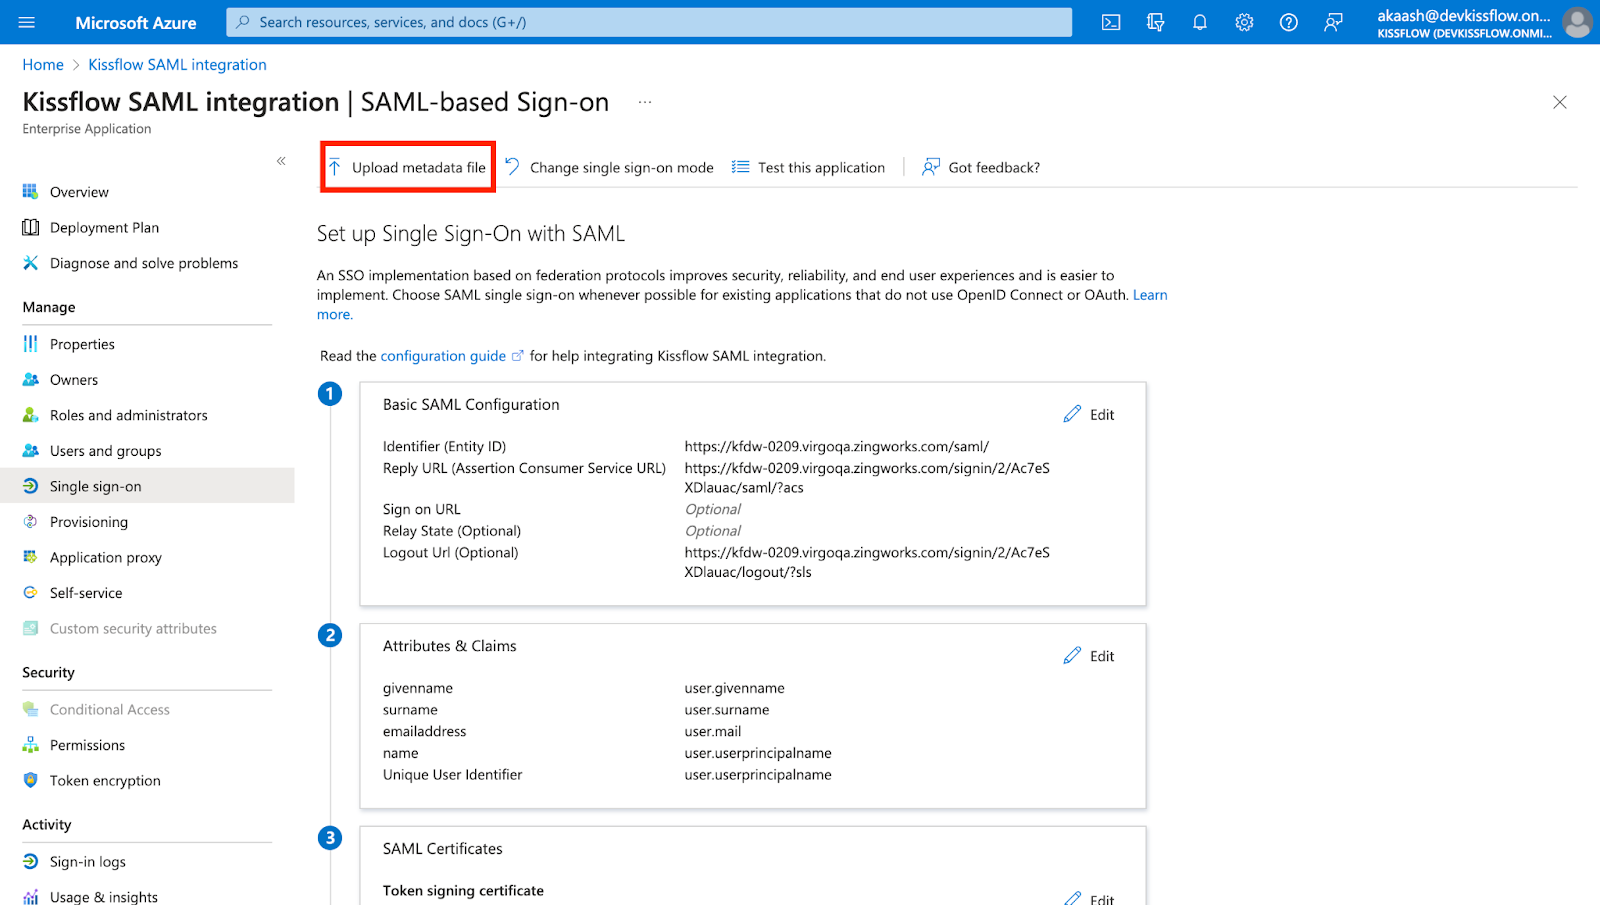
-
Scroll to Federation Metadata XML and click Download.
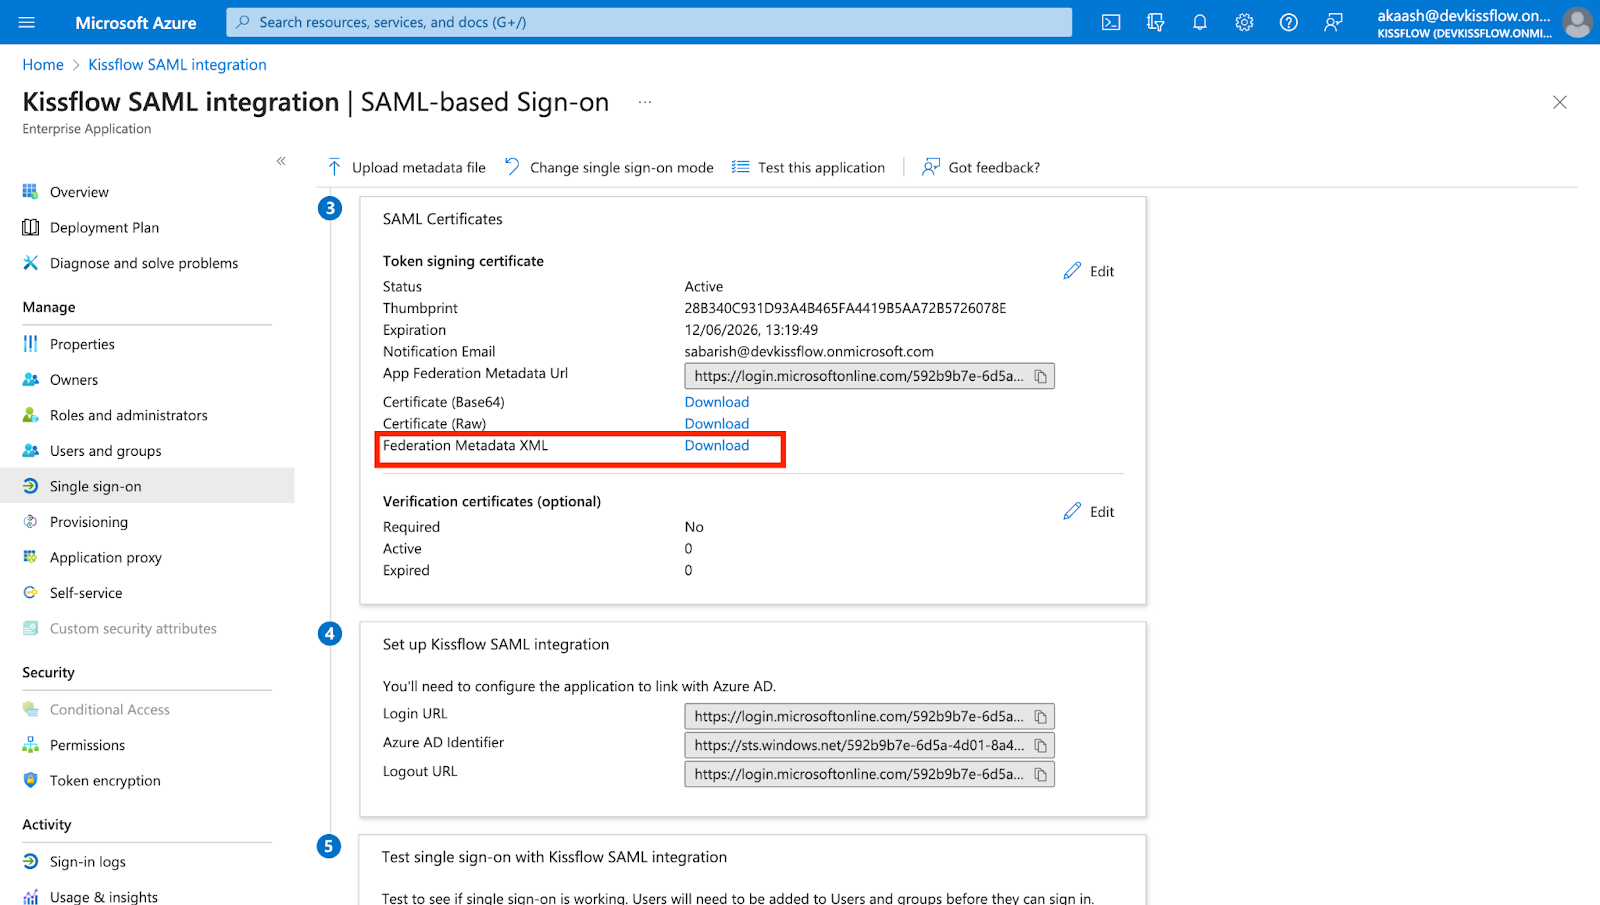
You'll upload this file back in Kissflow to complete the exchange.
Configure the IdP details in Kissflow
-
Back in Kissflow's SAML configuration screen, click Upload XML file and select the Federation Metadata XML file you downloaded from Entra ID.
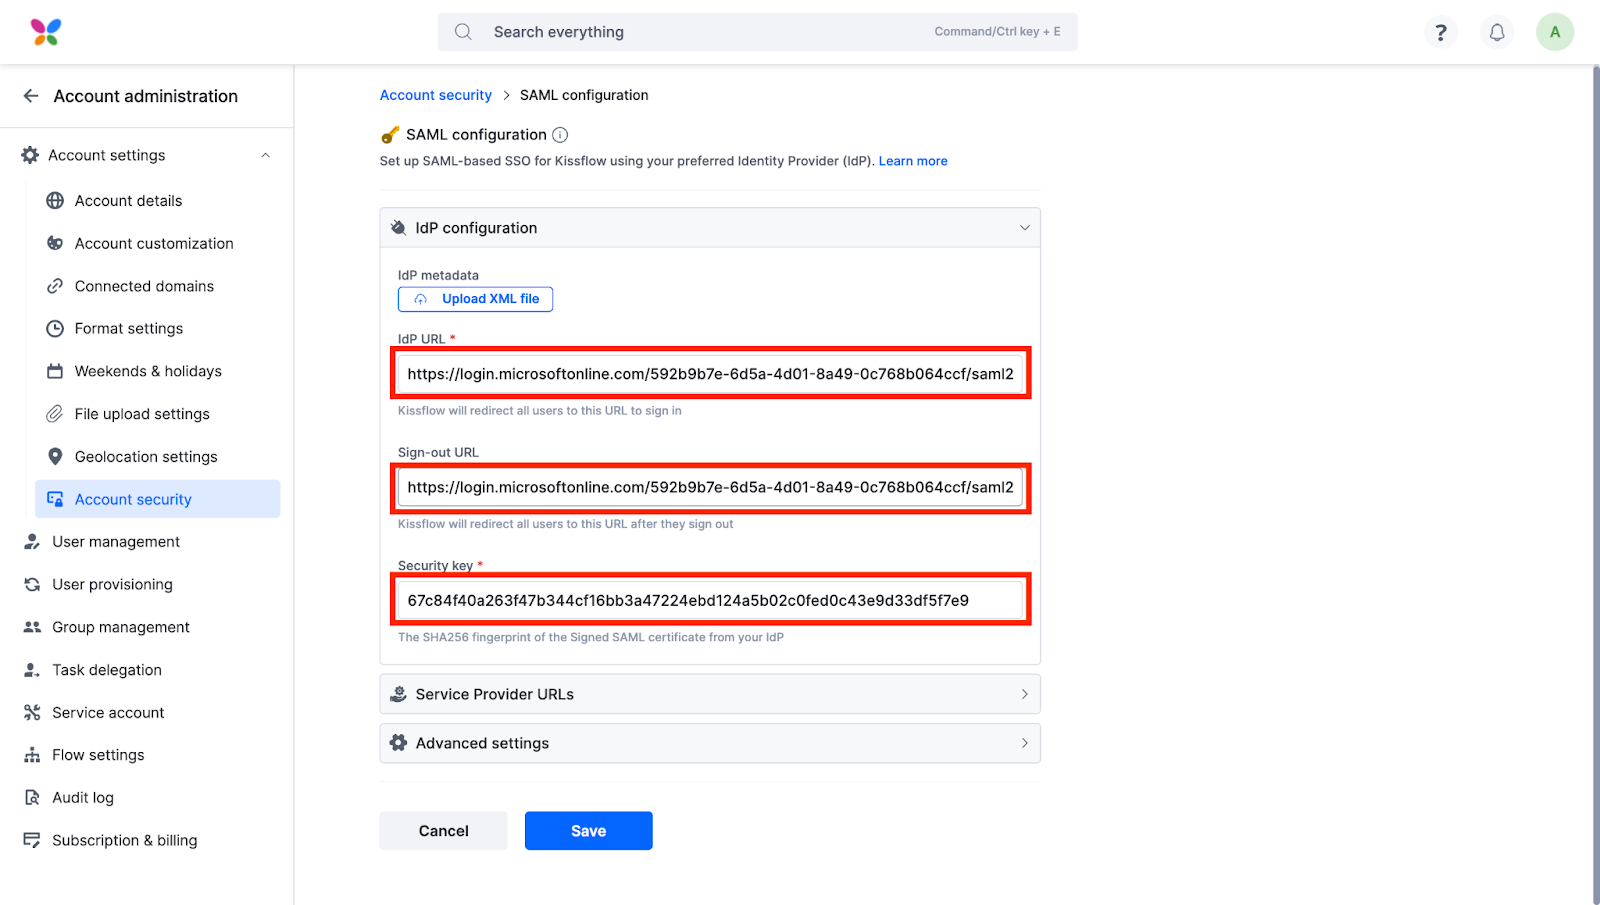
Note
Once the upload succeeds, the IdP configuration fields — Security key, Sign-out URL, and IdP URL — populate automatically from the XML file.
-
Under Advanced settings, review the Unique identifier for users. Email address is the default.
-
Check the box to have Kissflow automatically create new accounts when a user who doesn't already exist in Kissflow signs in via SAML-SSO.
-
Click Save to save the SAML configuration.
Test and enable SSO
-
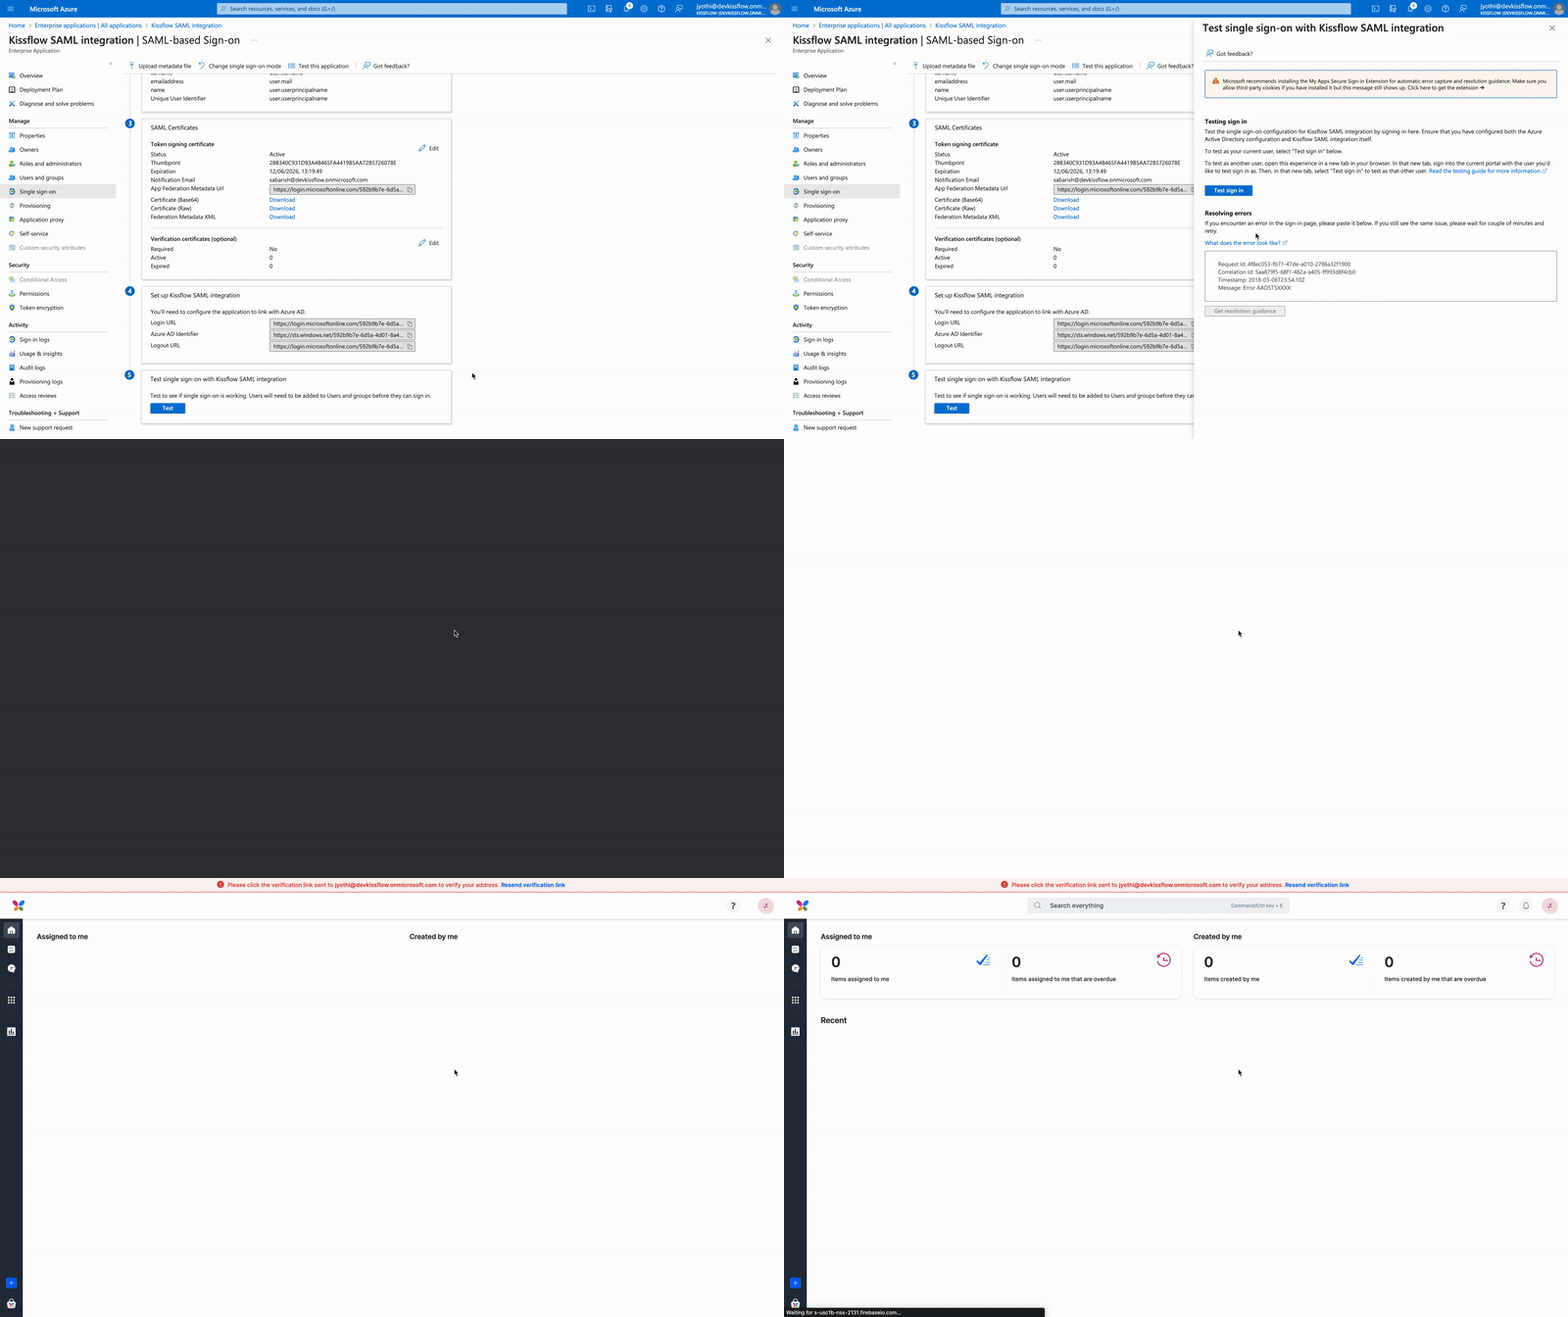
Go back to Entra ID and click Test this application on the top navigation bar. If the configuration is correct, Entra ID takes you to your Kissflow account's homepage.
-
Once the test succeeds, go to Account security in Kissflow and toggle SAML on.
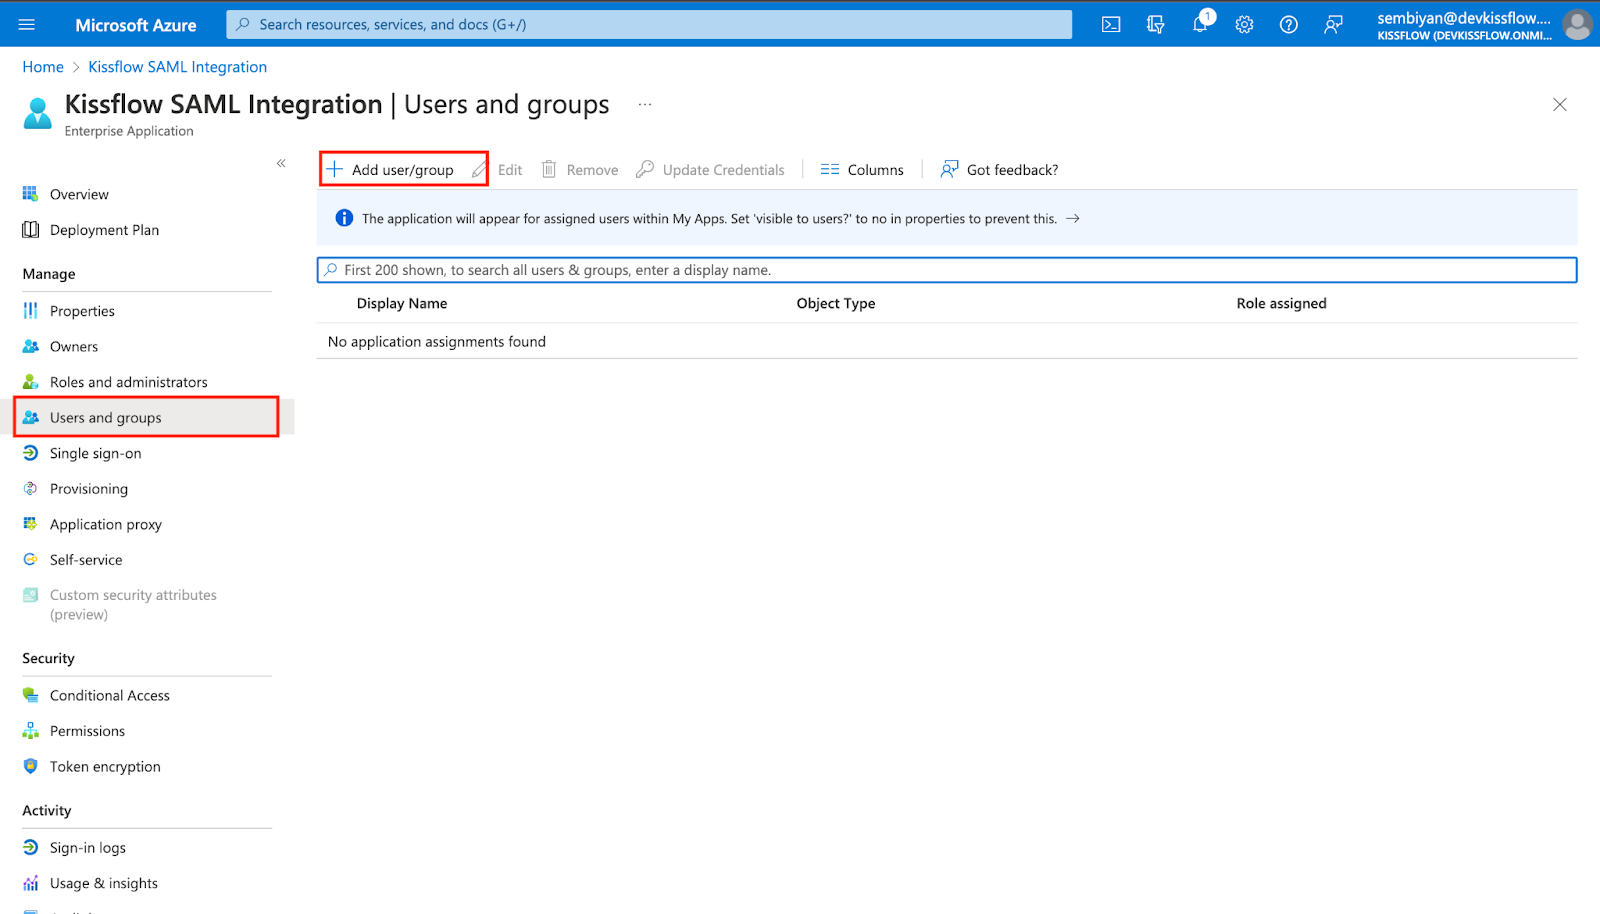
With SSO enabled, you can add the users and groups in Entra ID that should be authenticated in Kissflow via SAML.