

Importing data from a CSV
Import condition and result values into a decision table from a CSV file, with column mapping and error handling options.
Importing data from a CSV
Admins and members can import condition and result values into a decision table from a CSV file.
Note
Your decision table needs at least one condition or result before you can import a CSV file.
Import a CSV
-
Click the Import CSV button in the top-right corner and select your
.csvfile. Kissflow checks the file for corruption and delimiter errors — if an issue is found, fix it in the file and upload again. -
Map the CSV columns to the conditions and results of your decision table, then click Next. The first 10 rows of your file are shown as a preview, and columns whose header names match are mapped automatically.
Note
A CSV column can only be mapped to a condition or result with the same data type.
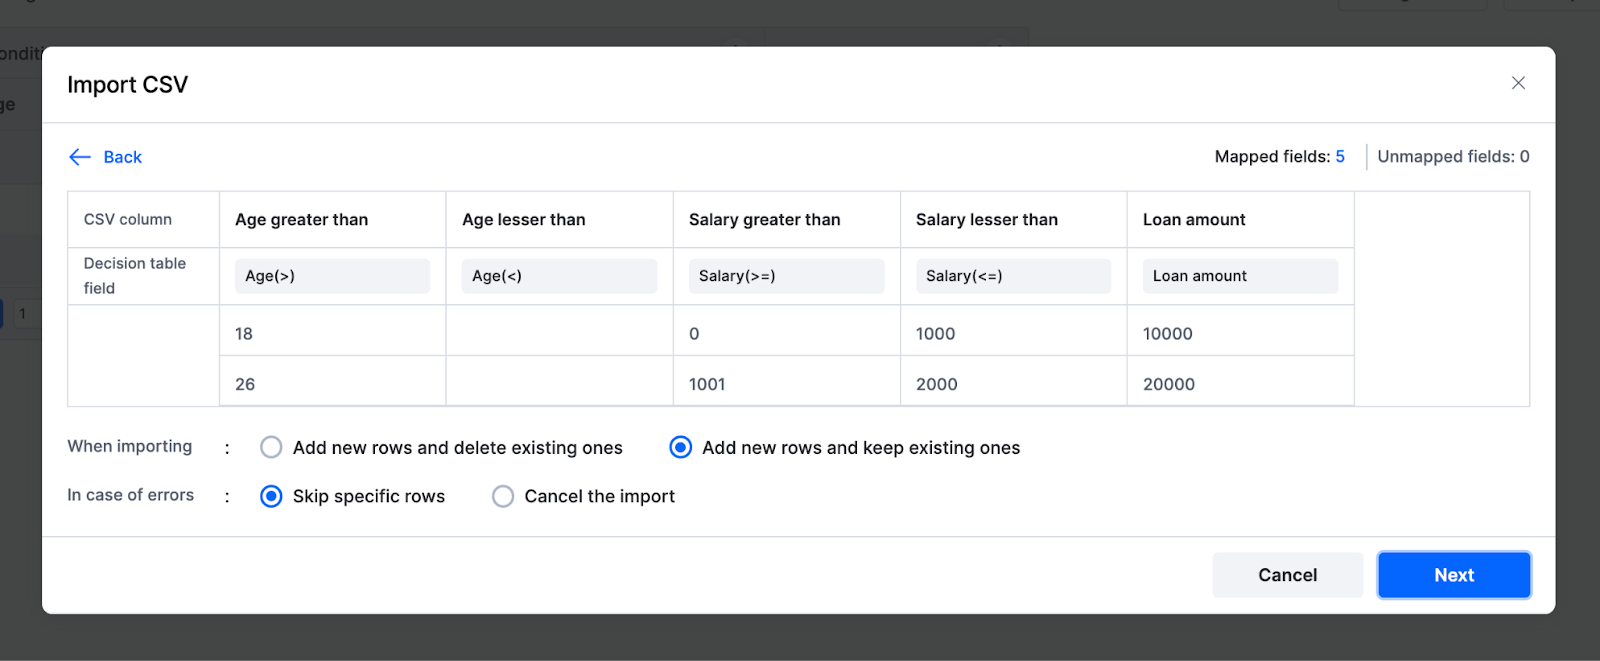
-
Choose how to handle the imported data:
- When importing: add new rows and delete existing ones, or add new rows and keep existing ones.
- In case of errors: skip the specific rows, or cancel the import.
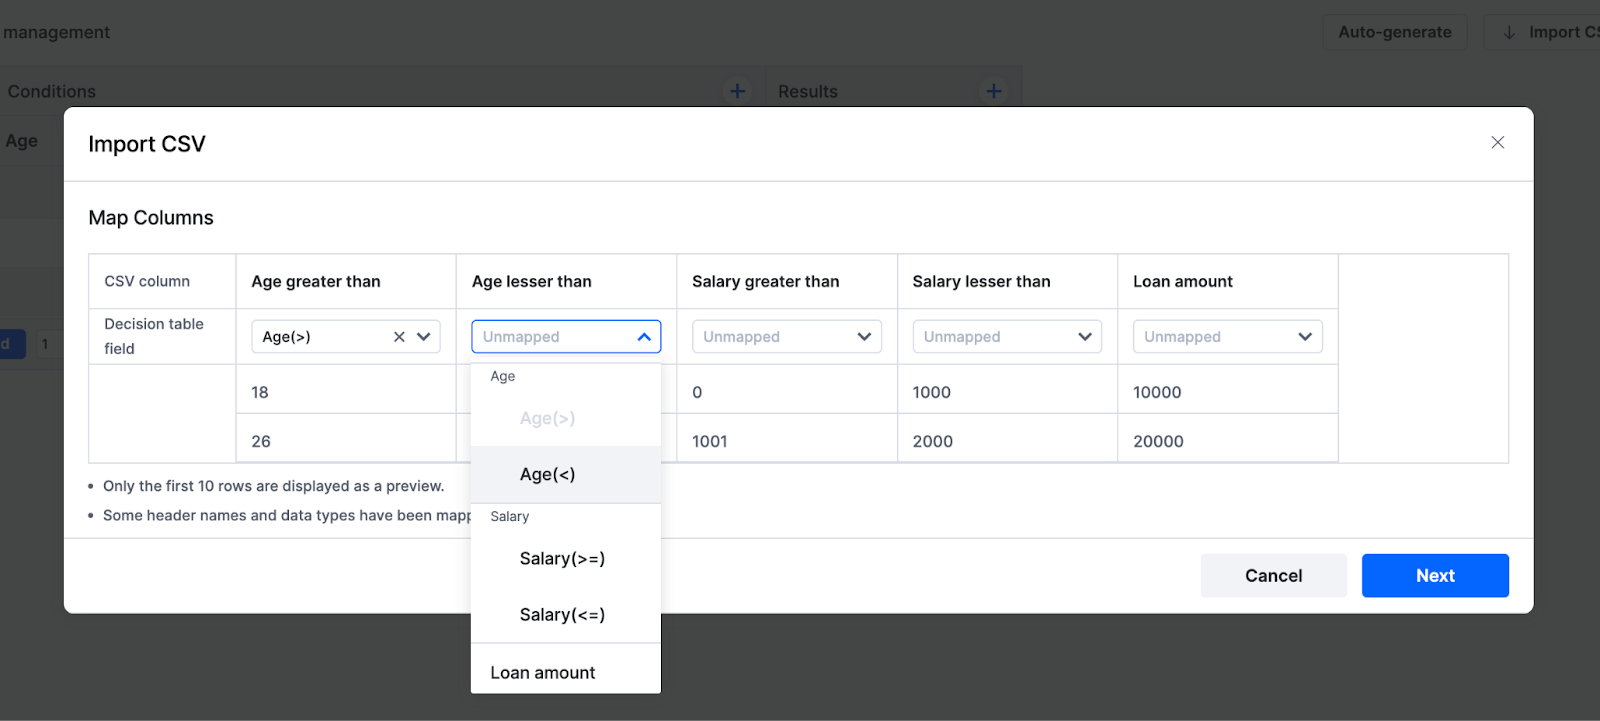
-
Click Next. Your data begins importing.
Limits
- A decision table holds up to 50,000 rows.
- Up to 1,000 rows can be added in a single import batch.