

Using a decision table inside apps
Evaluate a decision table from an app using the Kissflow SDK — a worked loan-approval example with form fields and button events.
Using a decision table inside apps
To evaluate a decision table from inside an app, use the Kissflow SDK. This walkthrough uses a simple example: a bank approves a loan application based on the applicant's income.
1. Create the decision table
Create a decision table with an Income condition (Range: >= lower limit, < upper limit) and an Eligibility result:
| Income >= | Income < | Eligibility |
|---|---|---|
| 15000 | — | Approved |
| 10000 | 15000 | Further review |
| 0 | 10000 | Denied |
2. Create the form
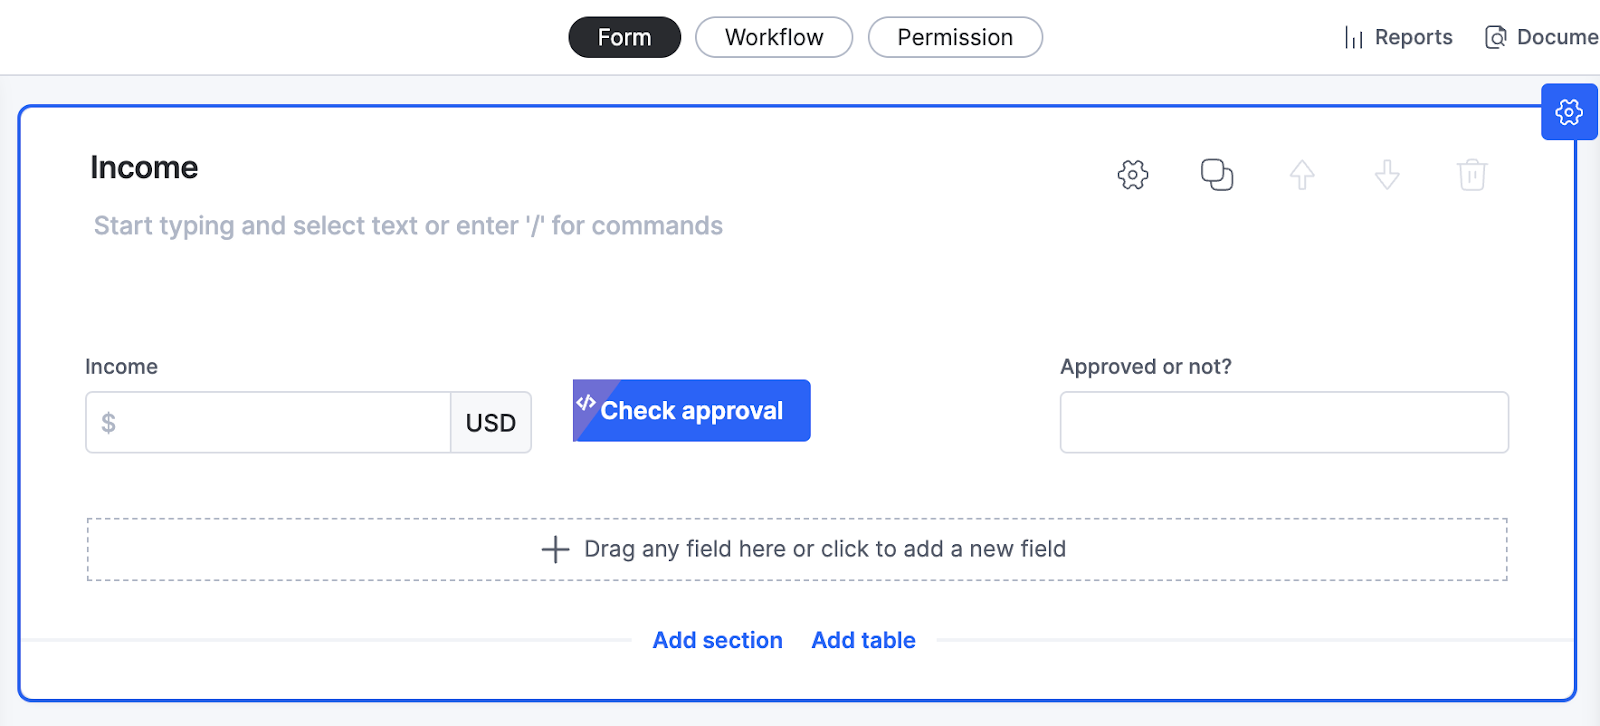
Create a process and add these fields to its form:
| Field name | Field type |
|---|---|
| Income | Currency |
| Check approval | Button |
| Approved or not? | Text |
3. Configure the button event
-
Select the Check approval button, open the Event tab, and click Add an event.
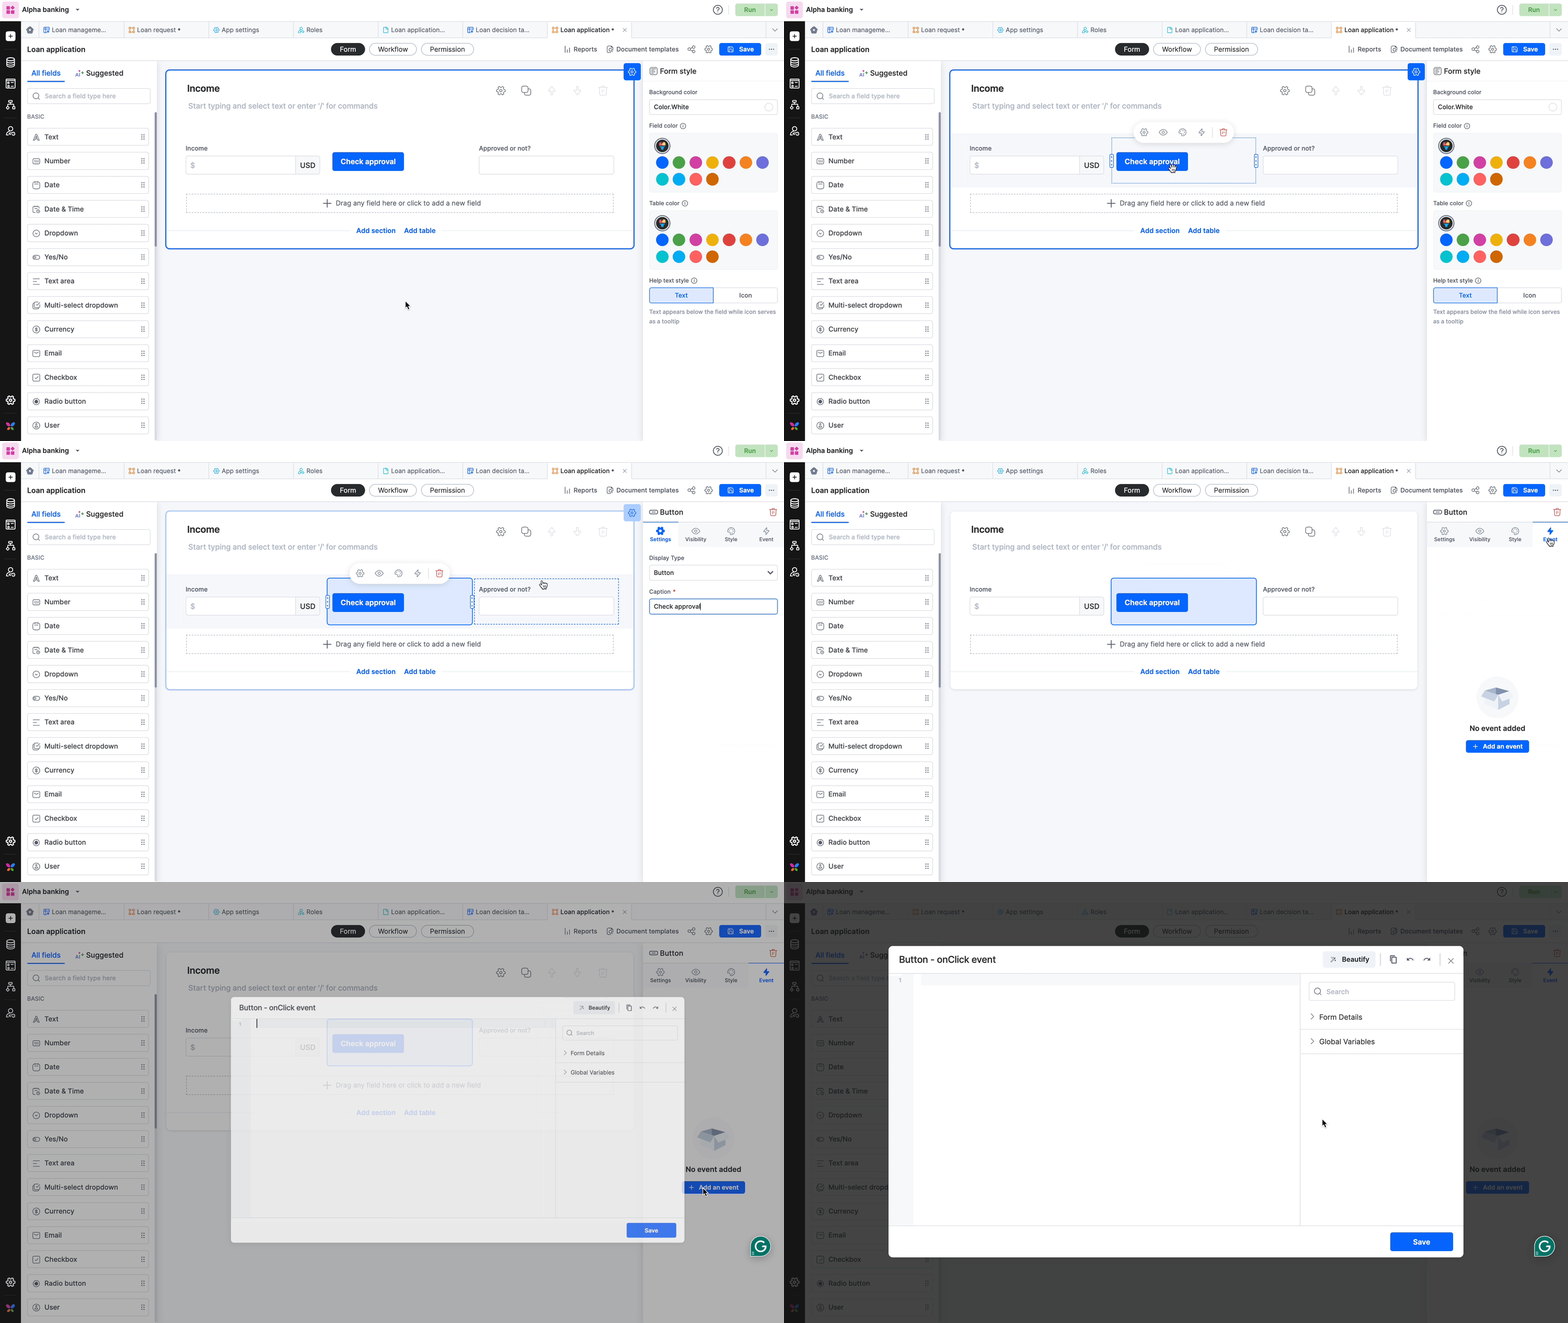
-
In the code editor, read the income value from the form using
getField()from the Forms SDK:let IncomeInput = await kf.context.getField("Income_process"); -
Evaluate the decision table using the Apps SDK:
let LoanDecisionTable = kf.app.getDecisionTable("Loan_decision_table_A00"); let decisionOutput = await LoanDecisionTable.evaluate({ Income_decision_table: IncomeInput });- Replace
"Loan_decision_table_A00"with your decision table's ID — it's the segment after the last slash (/) in the decision table's URL. - The keys in the
evaluate()payload are your condition IDs. A condition's ID is shown in the Field ID of the condition's settings panel — open it by clicking the condition's column header.
- Replace
-
Read the result. The evaluation response contains a
Dataarray of matched result rows:let outputValue = decisionOutput.Data.at(0); -
Write the result back to the form with
updateField():kf.context.updateField({ Approved_or_not: outputValue?.Eligibility });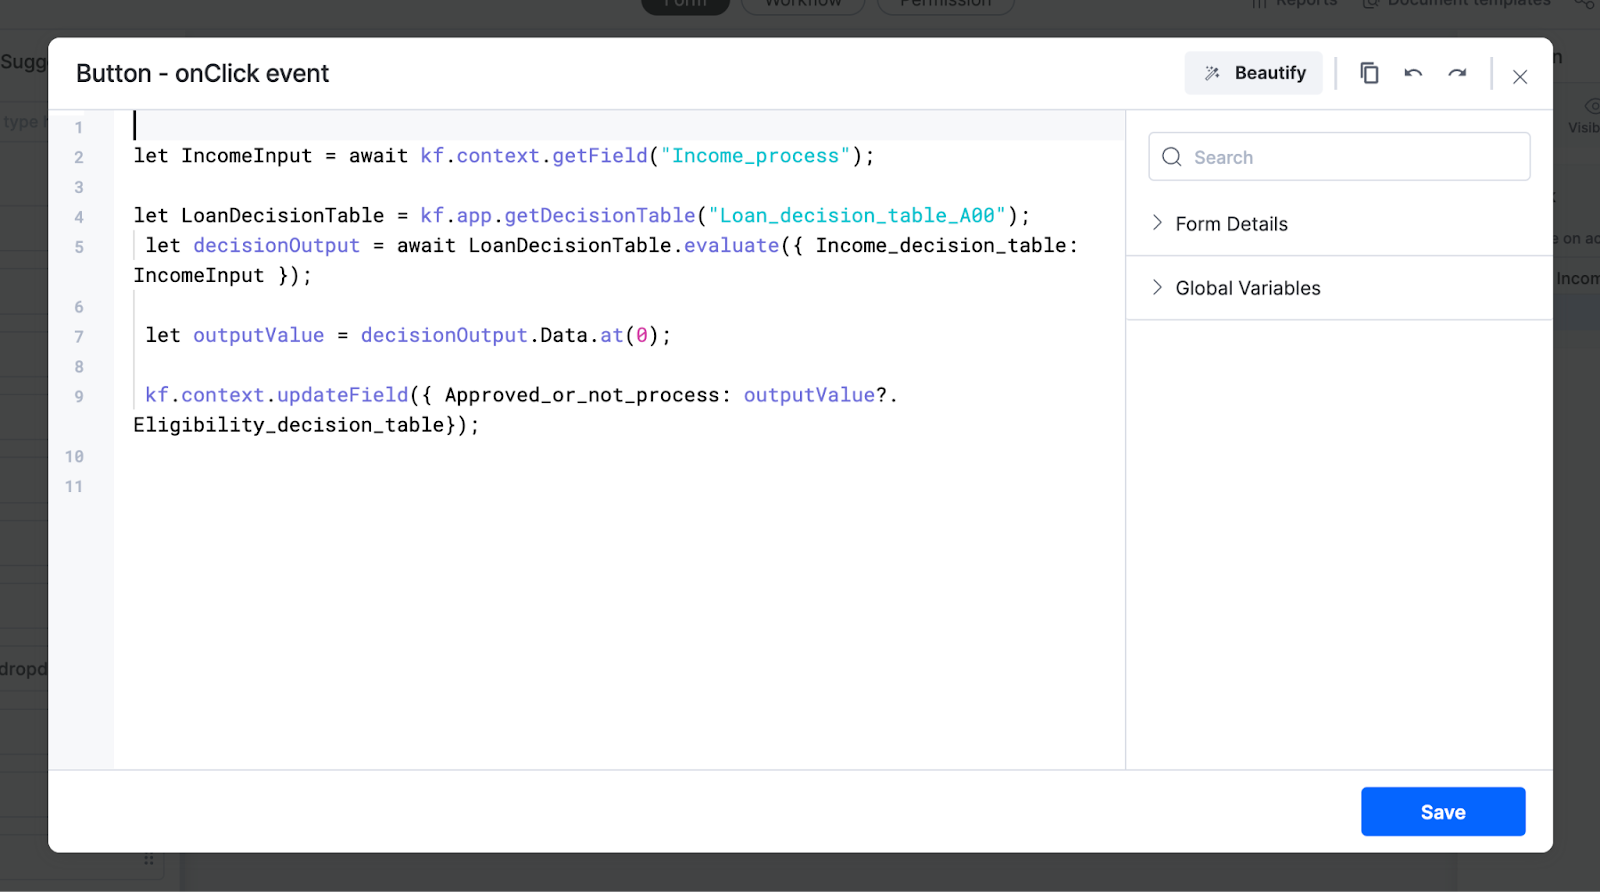
-
Click Save.
4. Deploy and try it
Deploy the app. In the process form, enter a value in the Income field and click Check approval — the decision table's result appears in the Approved or not? field.