

Creating a decision table
Create, name, and find decision tables inside the Kissflow app builder.
Creating a decision table
BasicEnterprise
You create decision tables inside an app in the development environment.
Create a decision table
- Open your app in the app builder.
- In the left panel, open the Logic tab and click the Create button.
- Enter a name and an optional description, then click Create.
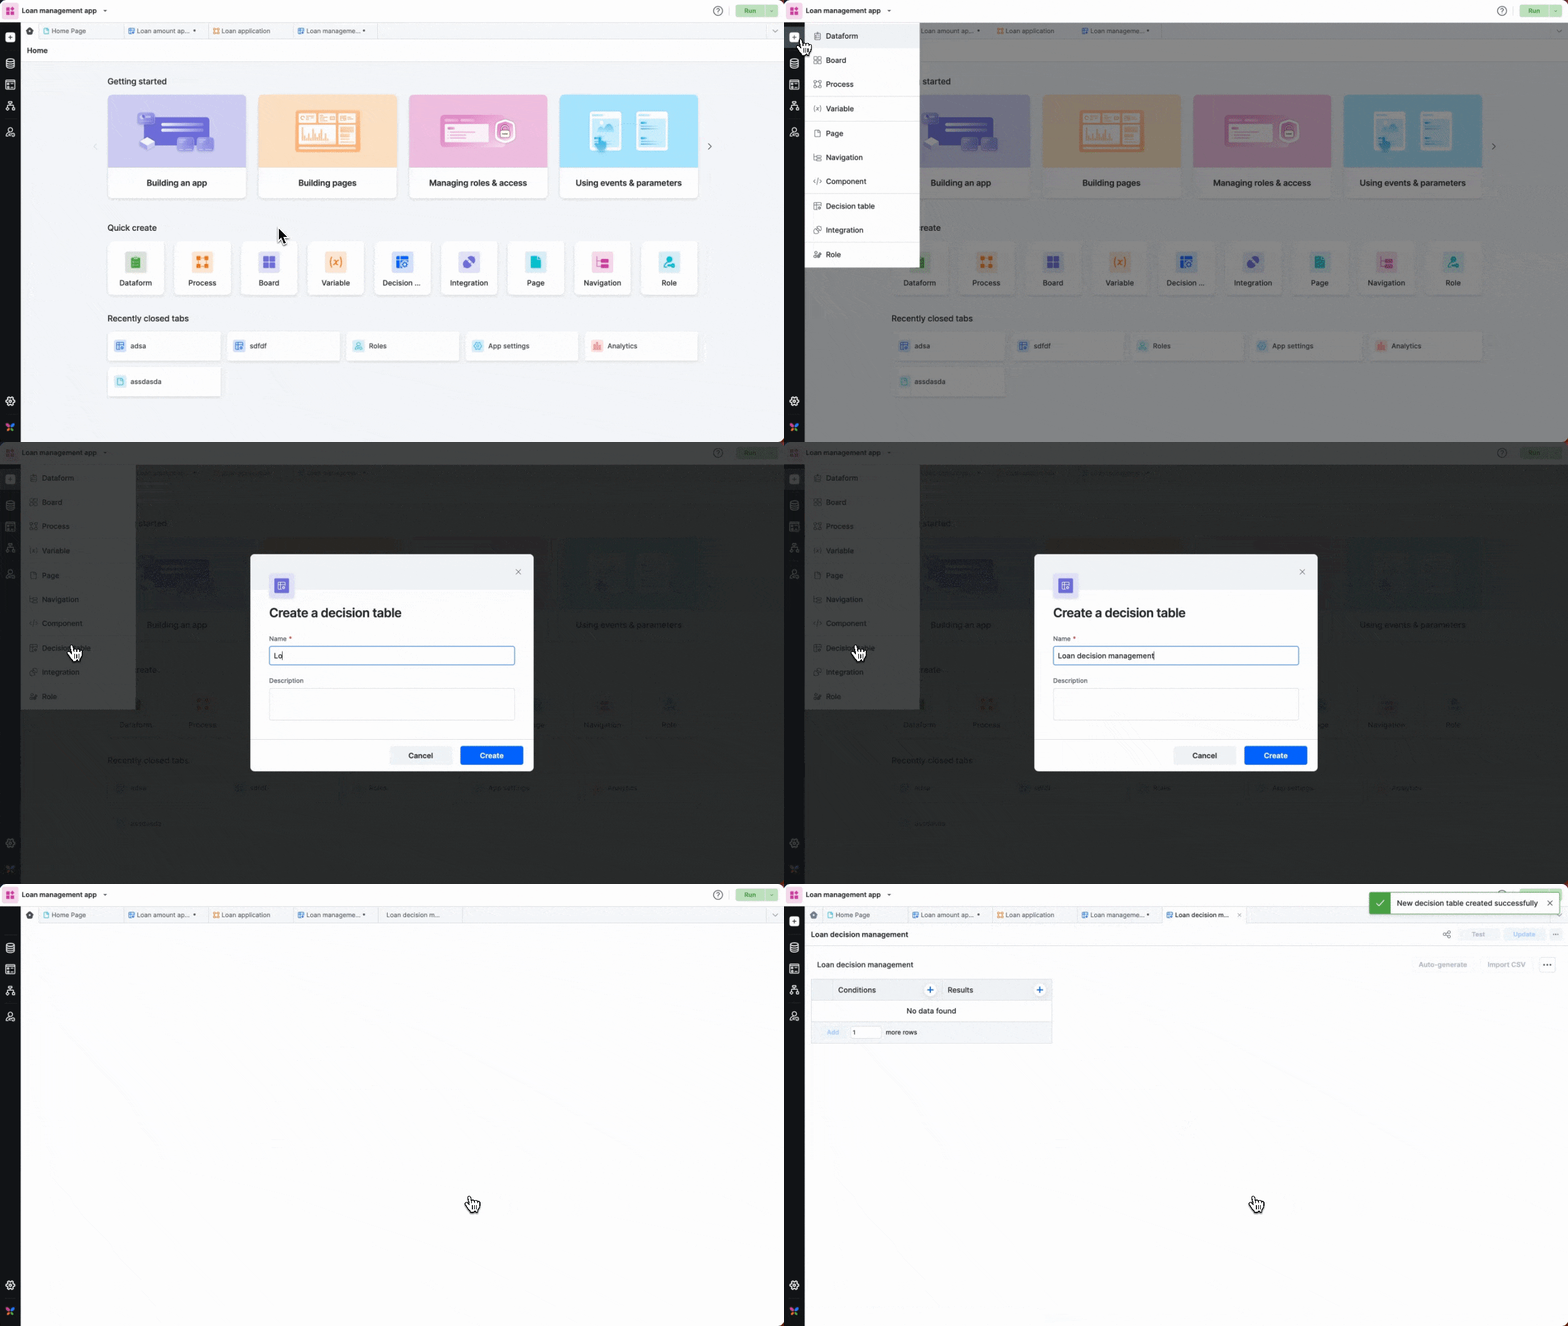
A new, empty decision table opens. Add conditions and results to start defining your logic.
Rename a decision table
To rename a decision table, click the More options button at the top right and select Rename. You can change the description the same way.
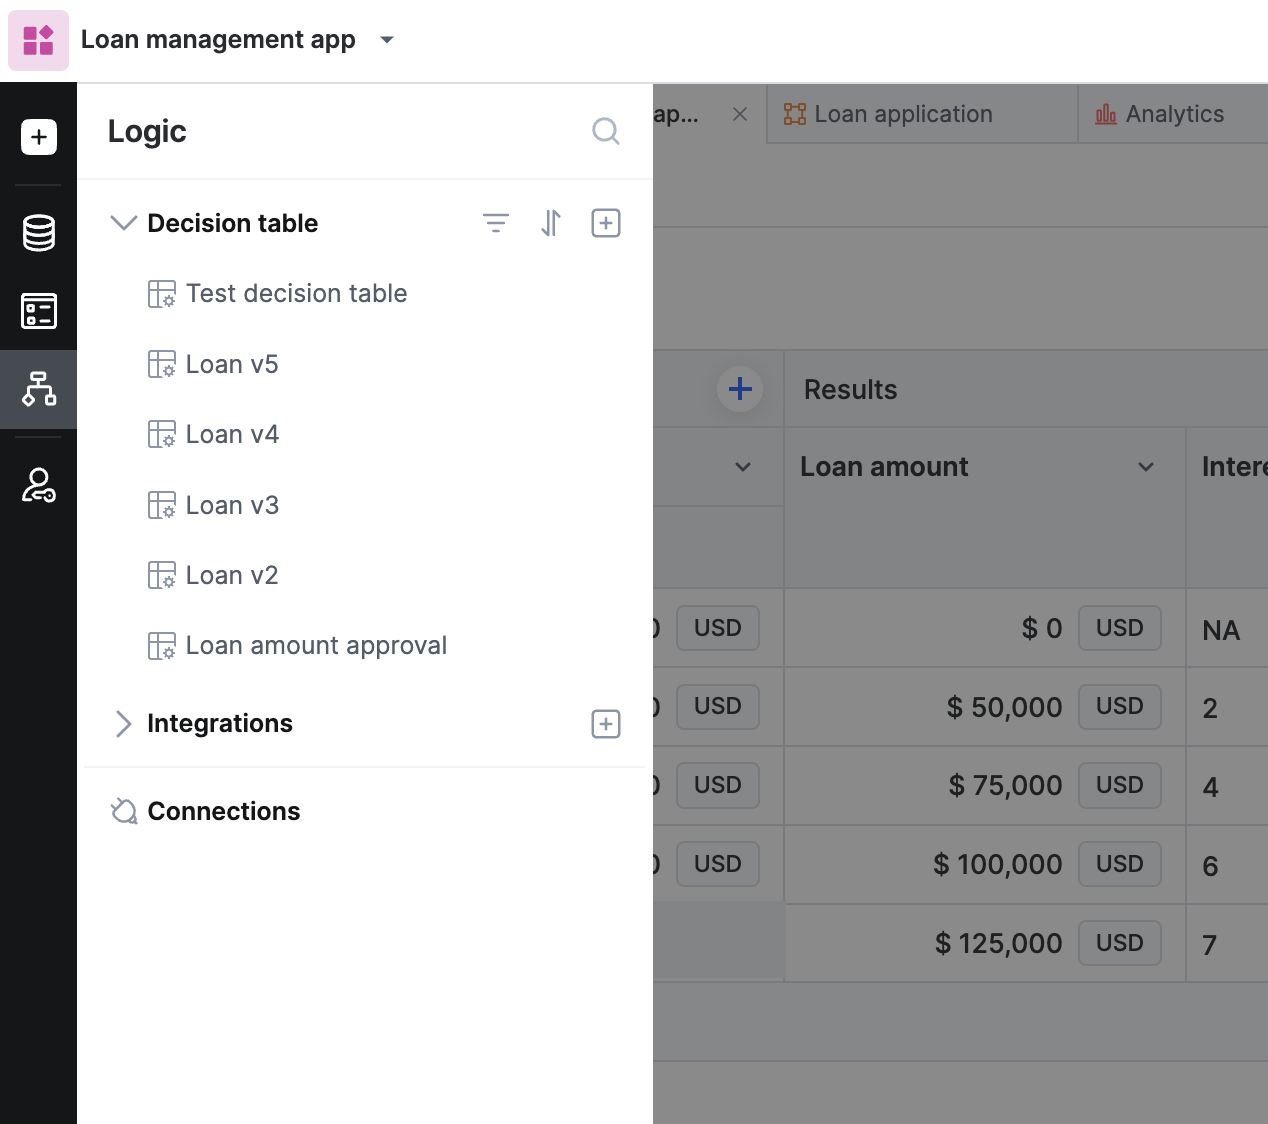
Find a decision table
Your decision tables are listed under the Logic tab in the app builder's left panel.
Limits
A decision table supports up to 10 conditions, 5 results, and 50,000 rows.