Admin notification settings
Turn on account-wide notification channels, configure a custom SMTP server for outbound email, and customize the welcome email, header, and footer sent to your users.
Admin notification settings
Notification settings lets Super Admins control how notifications go out across the entire account — which channels are on by default, which server sends the emails, and what those emails look like.
Global notifications
-
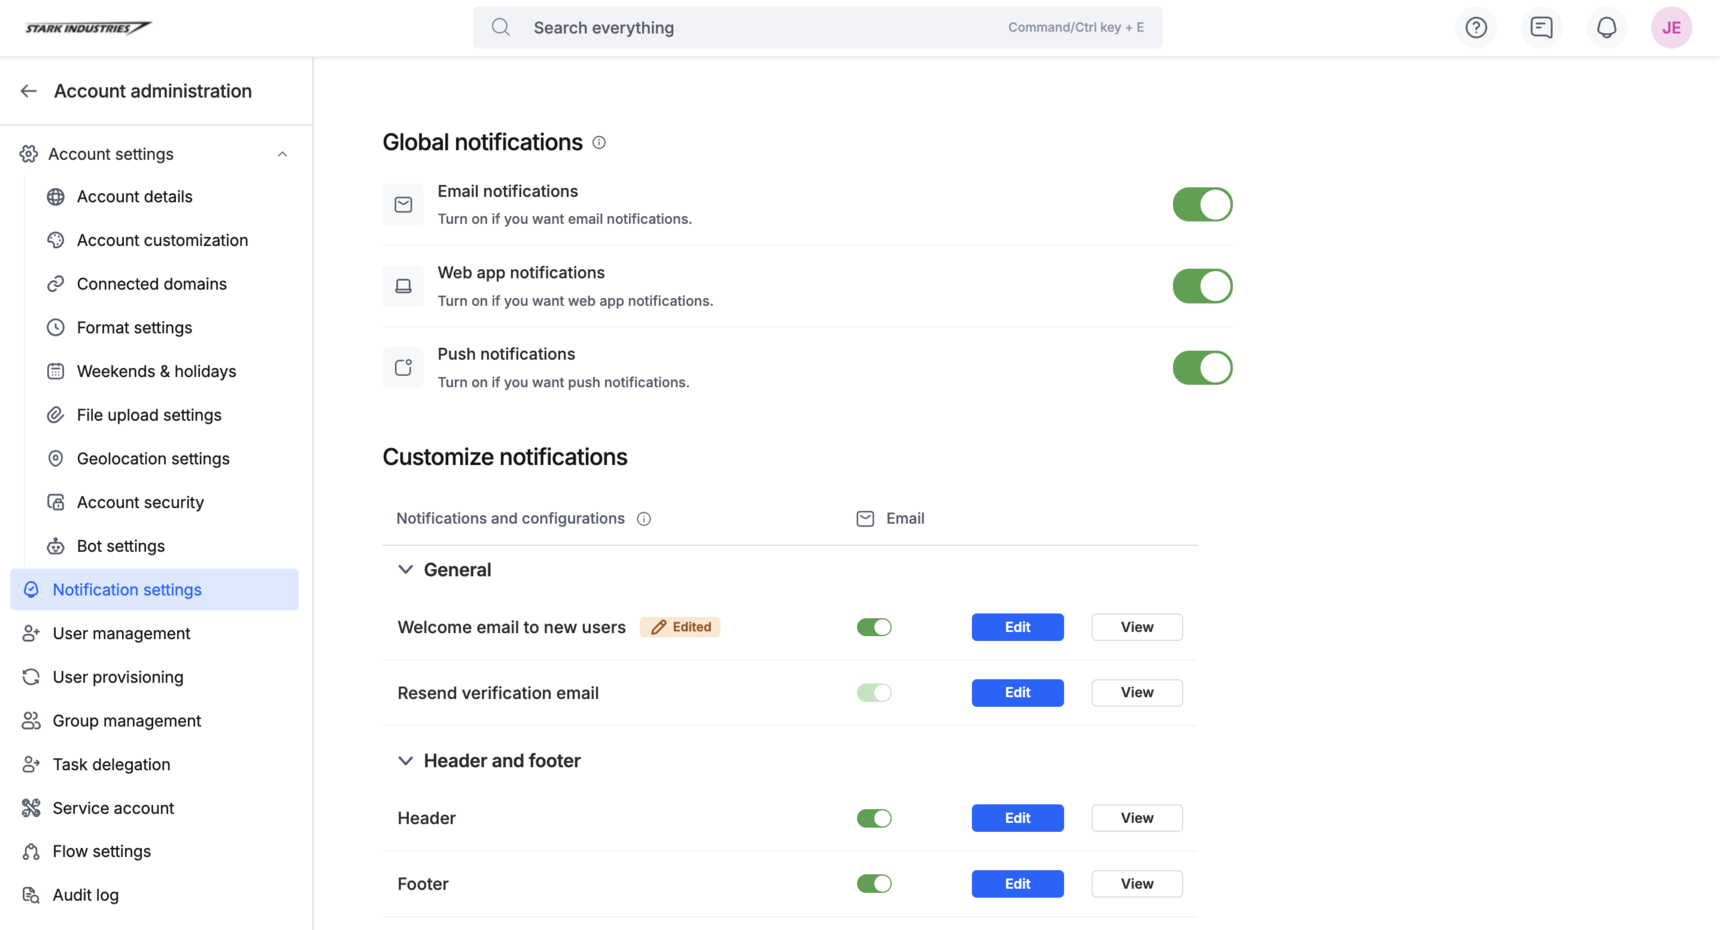
Click your profile picture > Account administration > Notification settings.
-
Under Global notifications, turn the following toggles on or off for every user on the account:
- Email notifications — sends notifications by email.
- Web app notifications — sends notifications within the web application.
- Push notifications — sends push notifications.
- Bot notifications — sends notifications through the Kissflow bot in Slack, Microsoft Teams, or Google Chat.
Note
Essential system notifications — such as those related to account security and user management — are prioritized and sent regardless of your channel settings, to make sure nobody misses critical updates.
Note
The examples below illustrate the kind of system notifications that bypass channel settings. The exact list may vary and isn't limited to these events.
| Notification | Trigger |
|---|---|
| User activated | A user's account is activated. |
| User deactivated | A user's account is deactivated. |
| Resend email verification | The verification email is resent. |
| Email address updated | A user's email address is updated. |
| User created | A new user is created. |
| Reset password | A user's password is reset. |
| 2FA status changed | A user's two-factor authentication status is changed. |
| Two factor verification | Two-factor authentication is enabled with an email code. |
| Domain verification | A verification email is sent to connect a domain. |
| Waiting for admin approval | A user creates a process, board, or dataset that requires admin approval. |
| Export | An export related to a user, board, dataform, dataset, or report is carried out. |
SMTP server settings
Note
SMTP server settings are available on Enterprise plans only.
By default, Kissflow sends notification emails from its own server. Super Admins can configure a custom SMTP server instead — useful if you want to route emails through your own infrastructure, or if you need to skip email verification for new users.
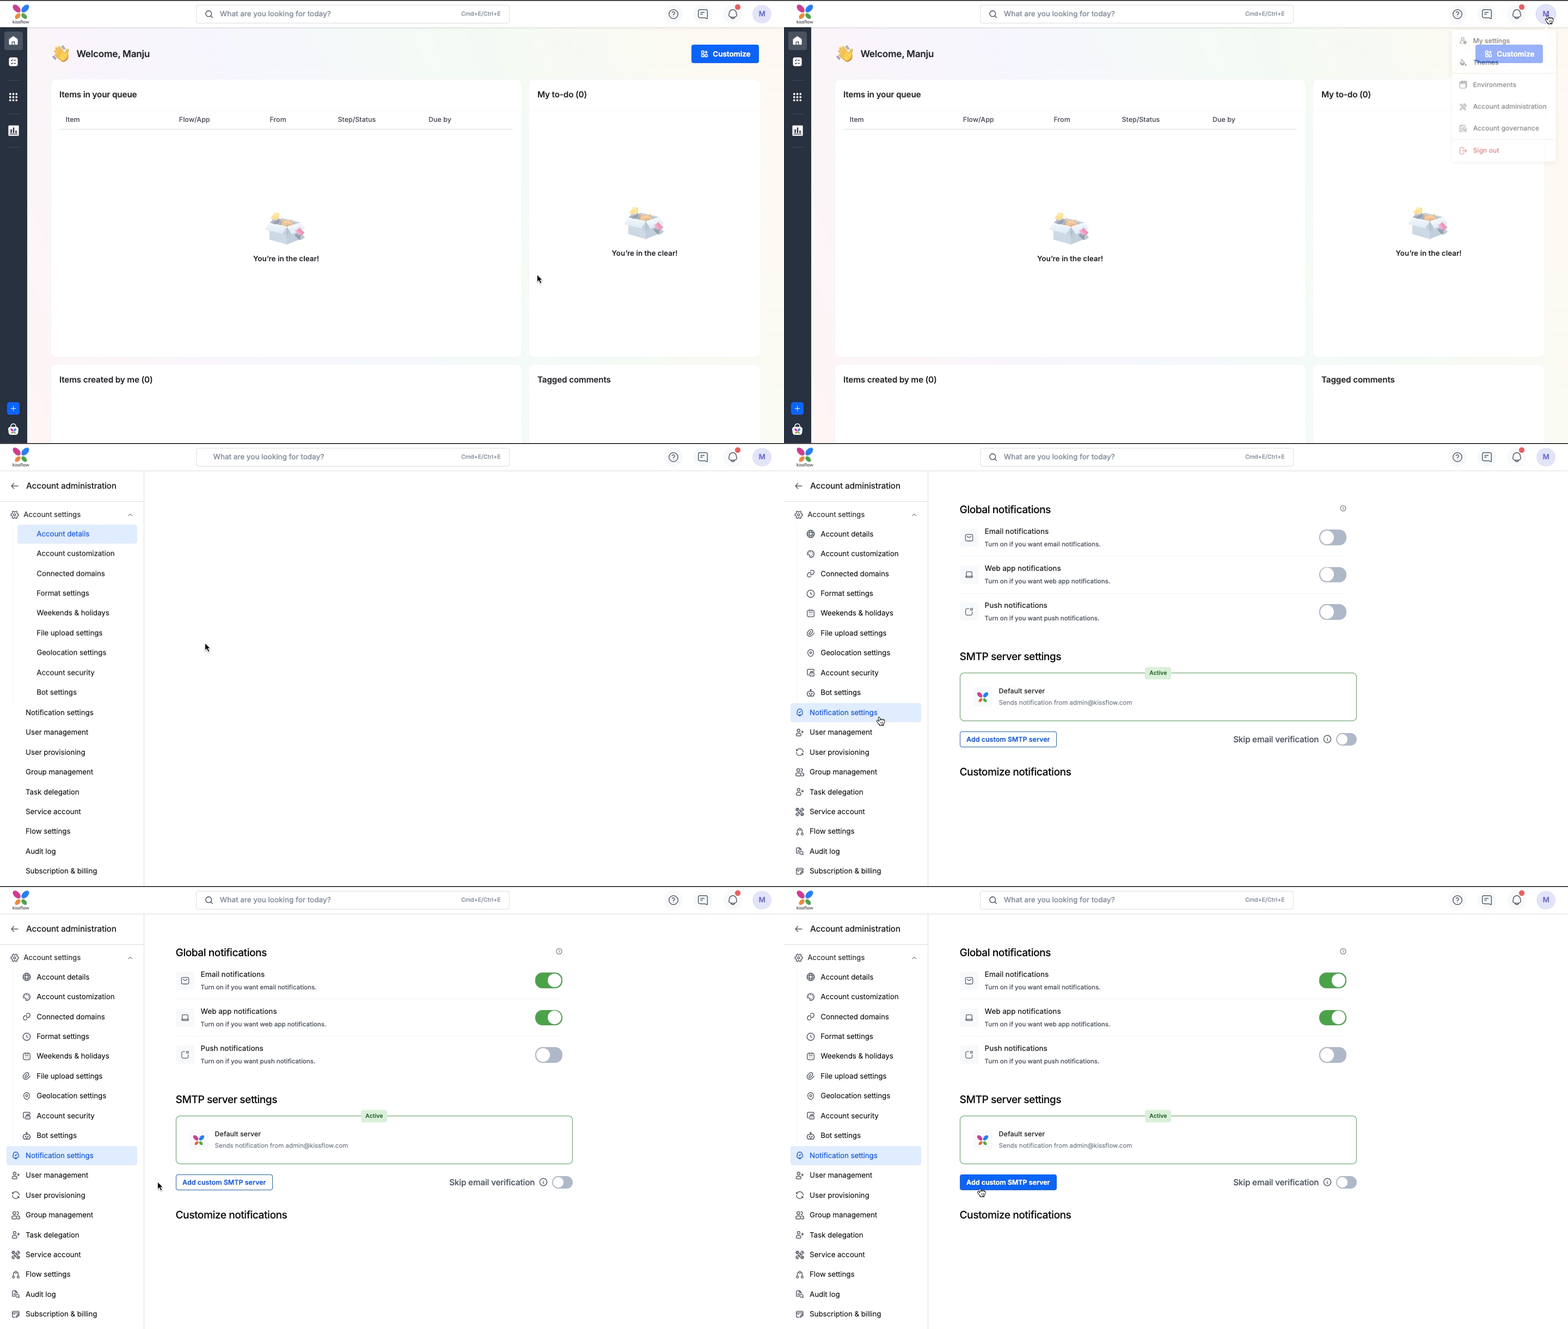
Click your profile picture > Account administration > Notification settings > SMTP server settings.
Add a custom SMTP server
-
Click Add custom SMTP server.
-
Fill in the server details:
- SMTP server name — a name to identify this configuration.
- Host — your SMTP server's host address.
- Port — the port number.
- Security protocol — STARTTLS or SSL/TLS.
- Authentication type:
-
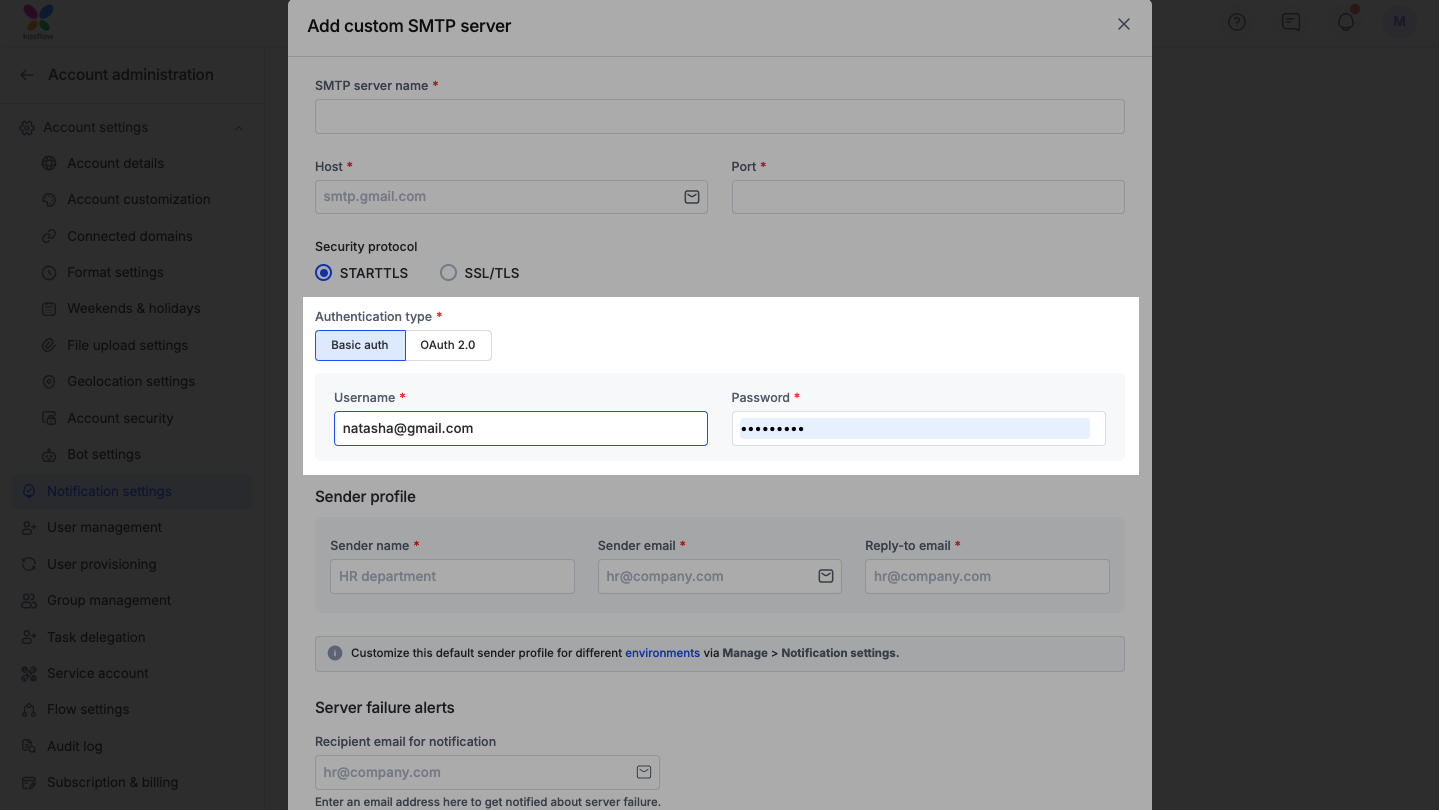
Basic auth — enter the Username and Password for your SMTP server.
-
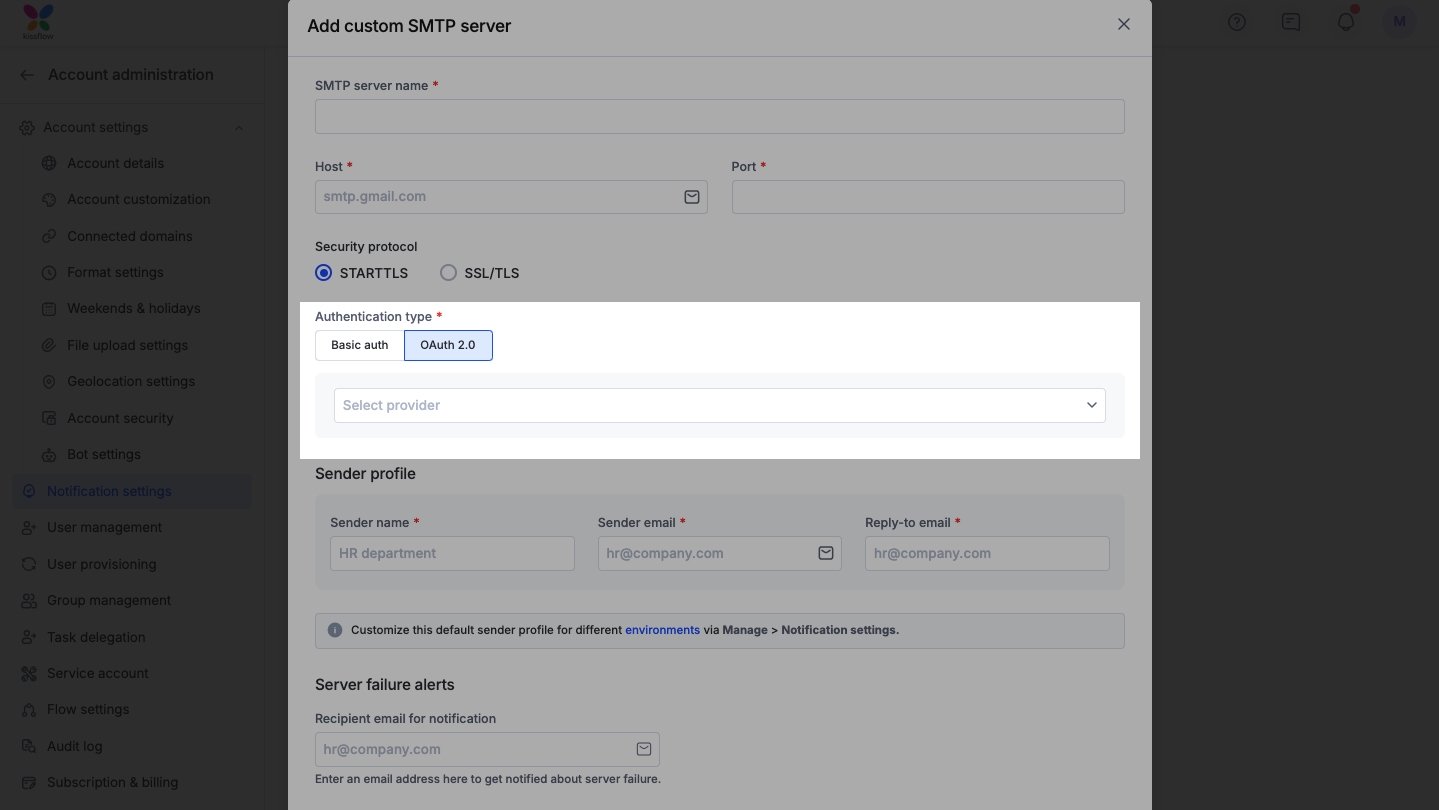
OAuth 2.0 — choose Google or Microsoft from the provider dropdown. You'll be prompted to sign in and authorize Kissflow to access the email account.
-
-
Configure the Sender profile — Sender name, Sender email, and Reply-to email.
By default, this profile applies to every environment (Development, Test, and Production).
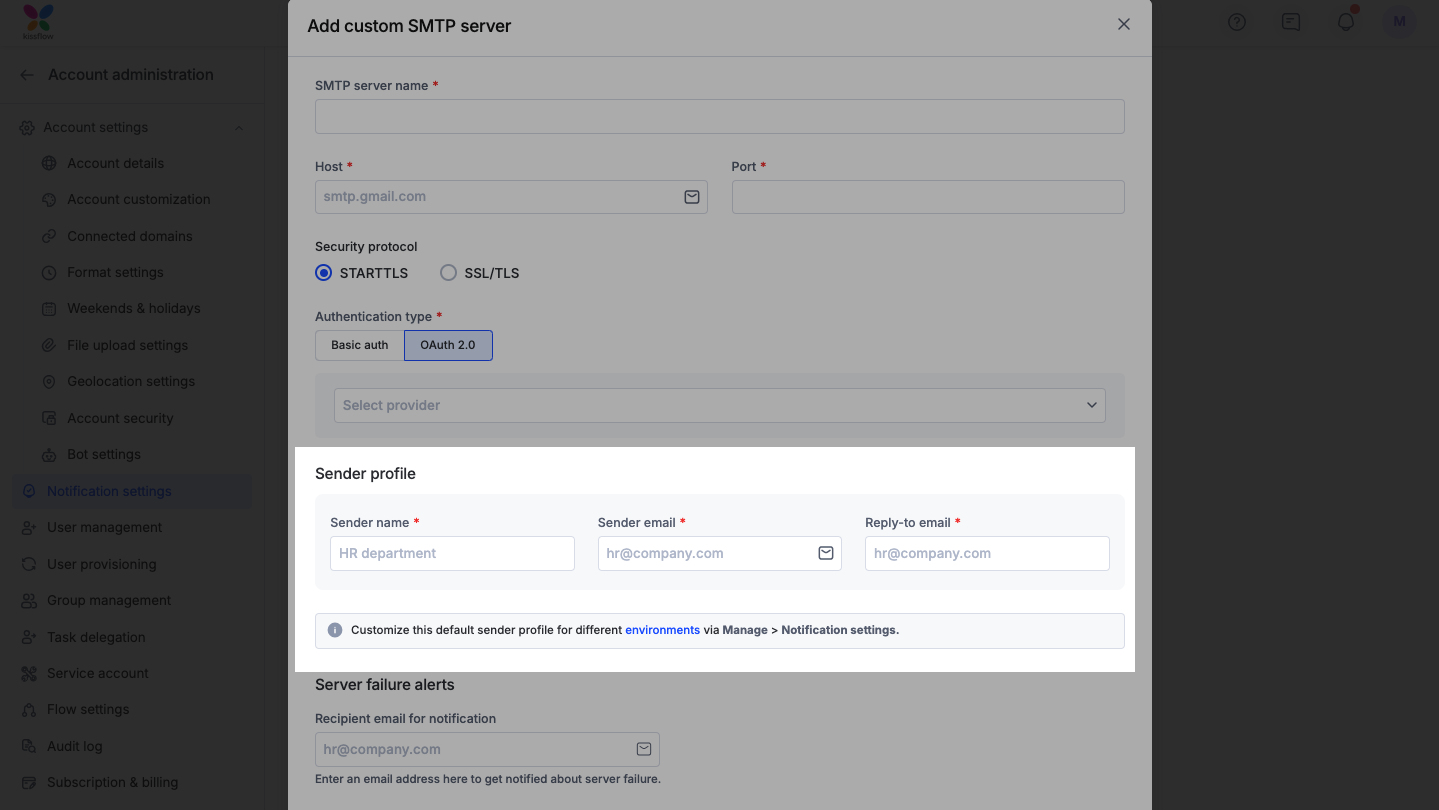
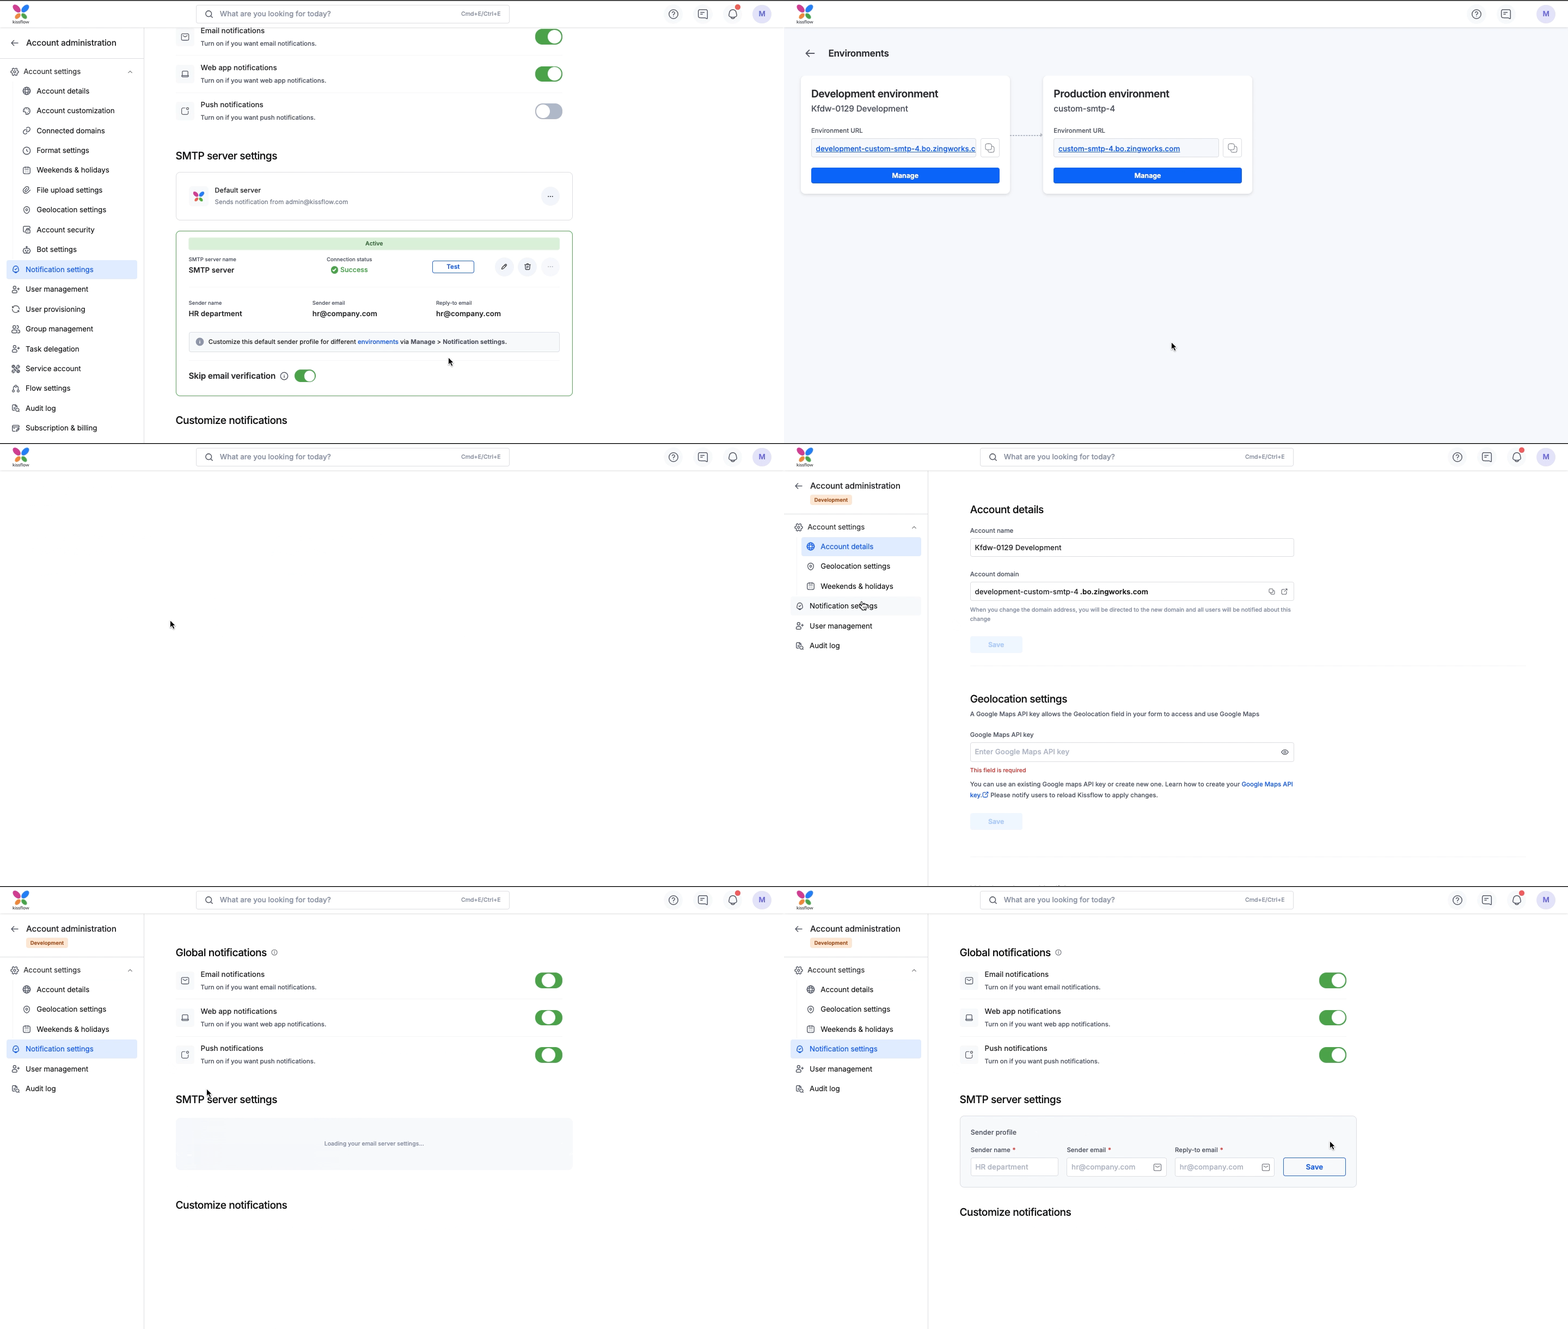
To override it for a specific environment:
-
Click the environments link in the banner to see your list of environments.
-
Click Manage on the environment you want to customize — for example, Development.
-
Go to Notification settings > SMTP server settings.
-
Click Create profile — visible once your server is successfully configured — enter the sender details for that environment, and save.
-
-
Under Server failure alerts, enter a recipient email address to be notified if the server fails to send emails.
-
Click Save and test. Your configuration is saved immediately, and Kissflow runs a connection test in the background — if the test fails, the server card shows a failed validation status, but your saved configuration isn't affected.
-
To switch between the Default server and your custom server at any time, click the More options icon (
 ) on either card and select Switch to this server.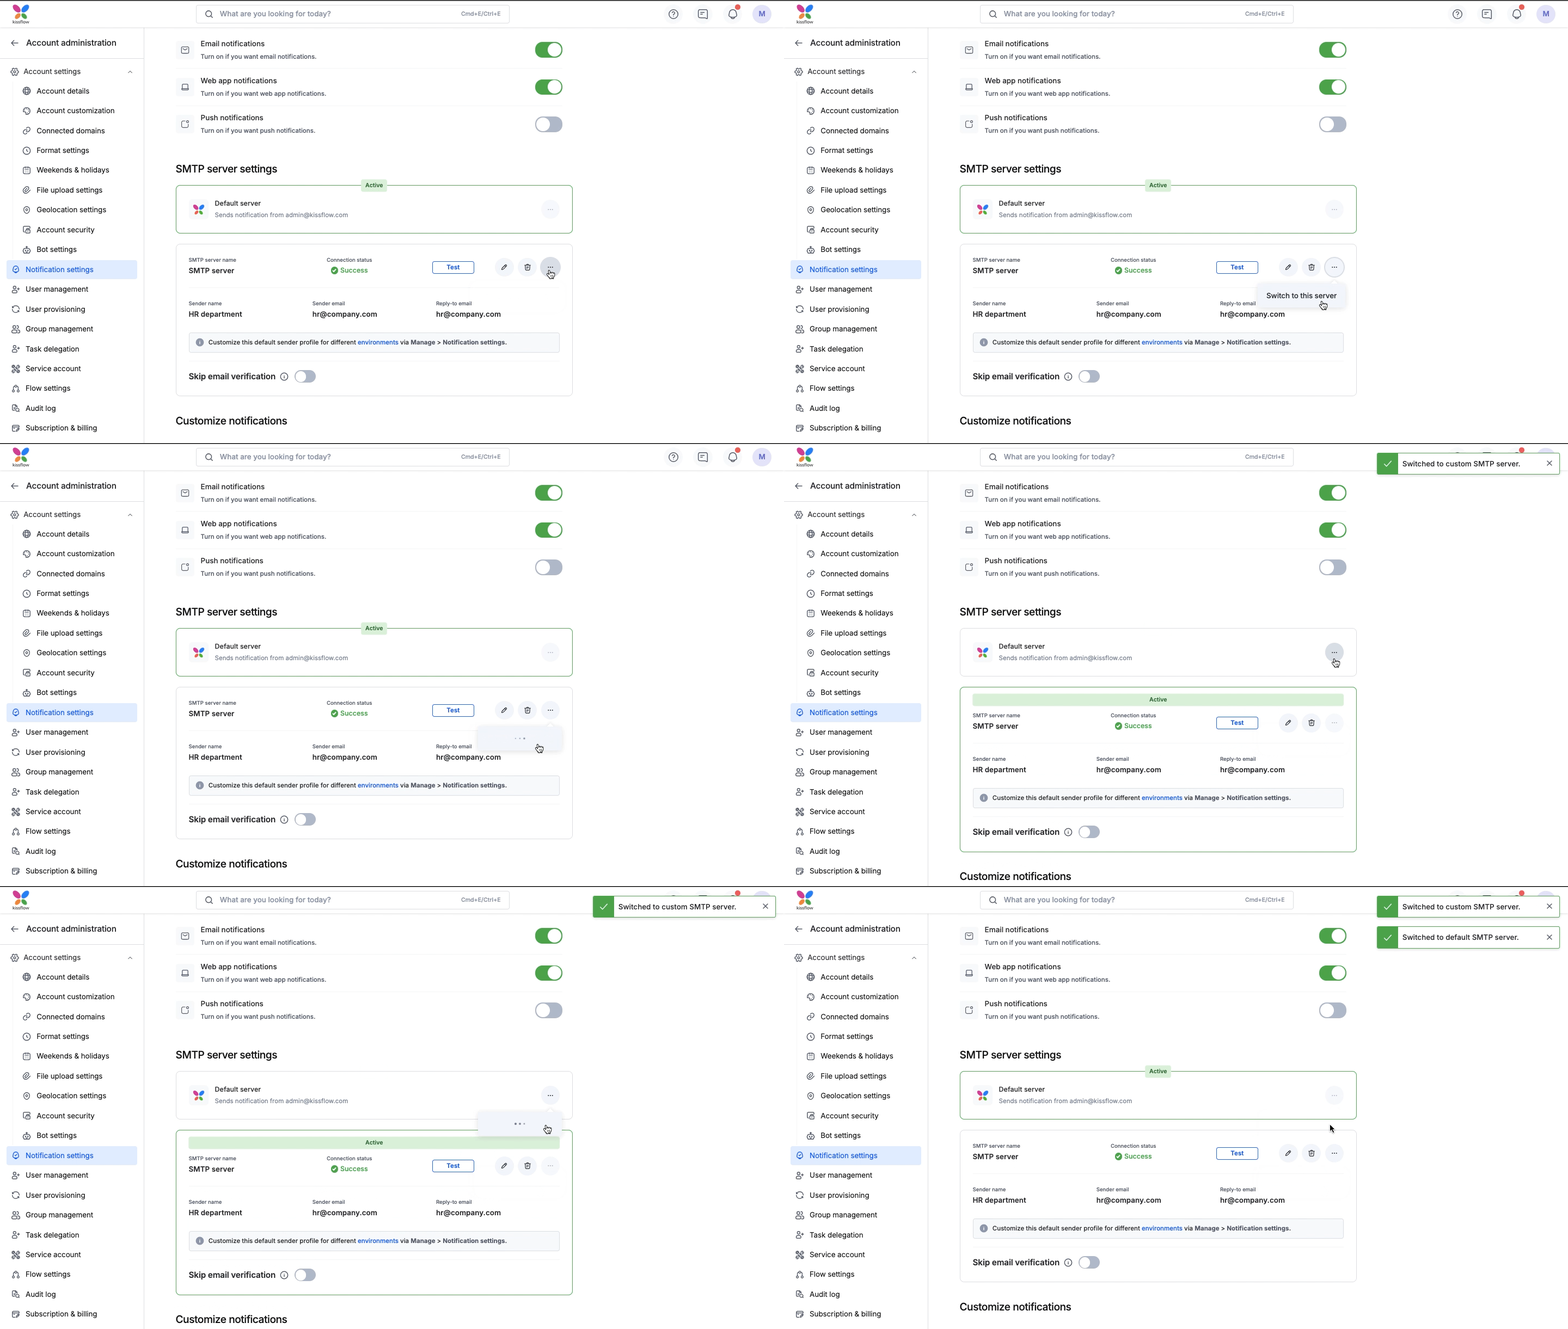
Skip email verification
The Skip email verification option lets new users receive notification emails immediately, without first verifying their email address.
Important
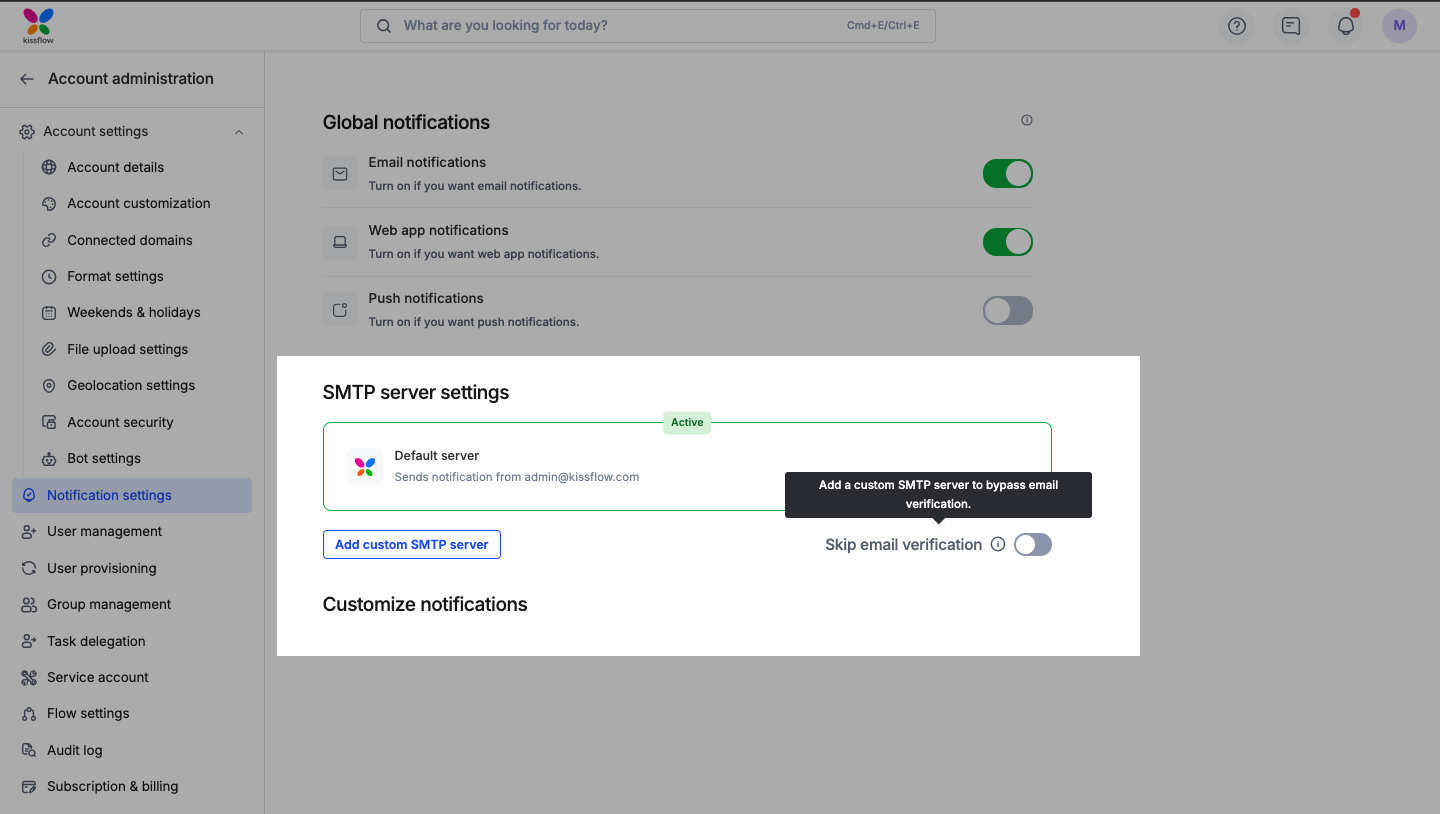
This is only available with a custom SMTP server — you can't enable it while using the default Kissflow server.
Toggle Skip email verification ON on your custom SMTP server card.
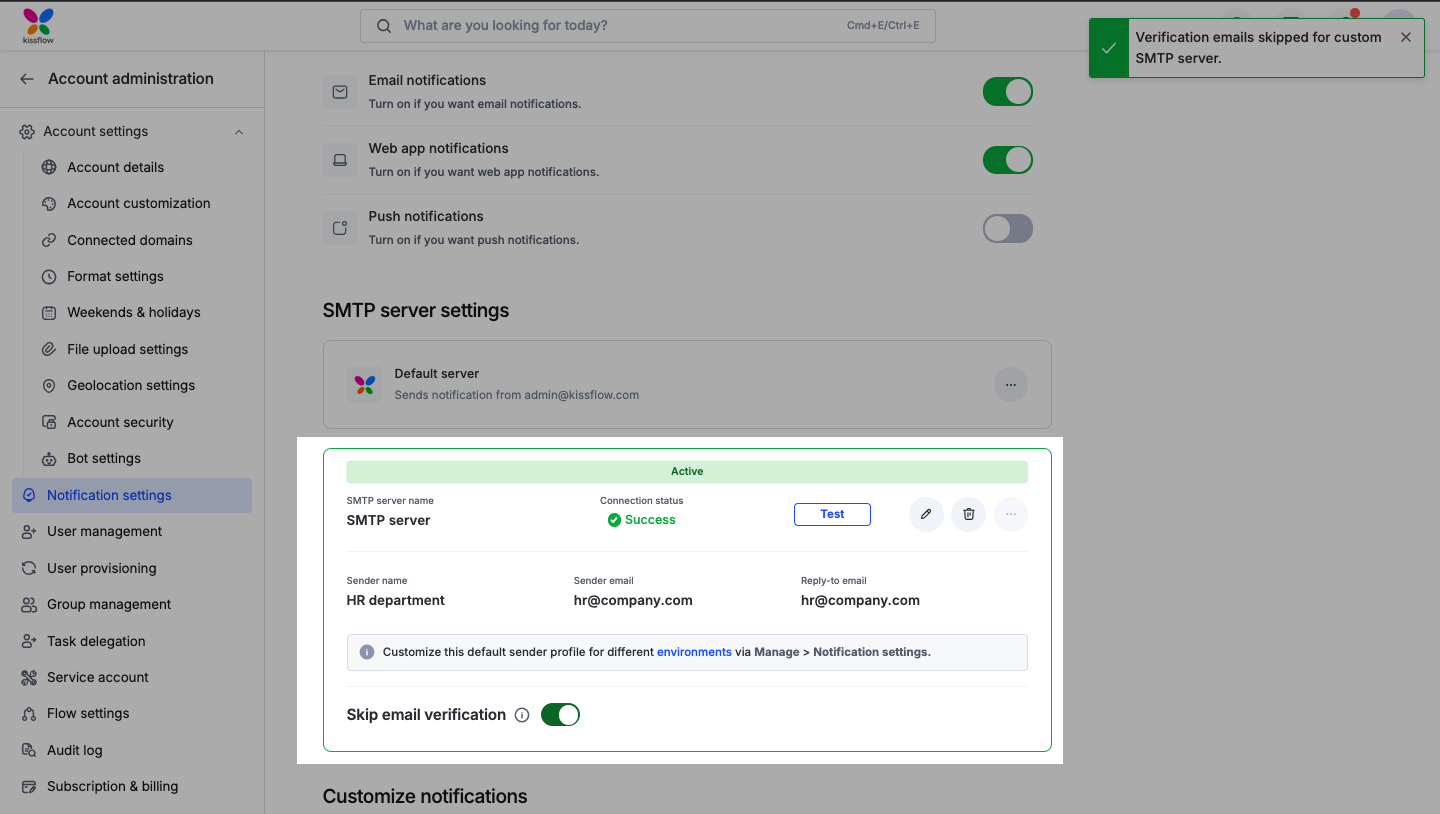
If you haven't configured a custom server yet, switching this toggle prompts you to add one.
Edit an active custom SMTP server
You can't change a custom SMTP server's configuration while it's actively sending emails.
- Click the Edit icon (
 ) on the active server card.
 - In the confirmation popup, click Disable and edit.
- Update the server details or sender profile.
- Click Save and test.
- Once you're ready to use it again, switch back to the custom SMTP server.
Note
While you're editing, the account temporarily switches to the Default server so email delivery isn't interrupted.
Delete an active custom SMTP server
- Click the Delete icon (
 ) on the active server card.
 - In the confirmation popup, click Disable and delete.
Note
The account automatically reverts to the Default server once the custom server is deleted.
Edit an inactive custom SMTP server
If a custom server isn't currently active, you can update it directly — no disable step required.
- Click the Edit icon on the inactive server card.
- Update the server details, credentials, or sender profile.
- Click Save and test.
Delete an inactive custom SMTP server
- Click the Delete icon on the inactive server card.
- Click Delete to confirm.
Customizing account notifications
Under Customize notifications, Super Admins can edit the content of emails sent from the account — the welcome email, the resend-verification email, and the header and footer that wrap every email.
Editing emails
-
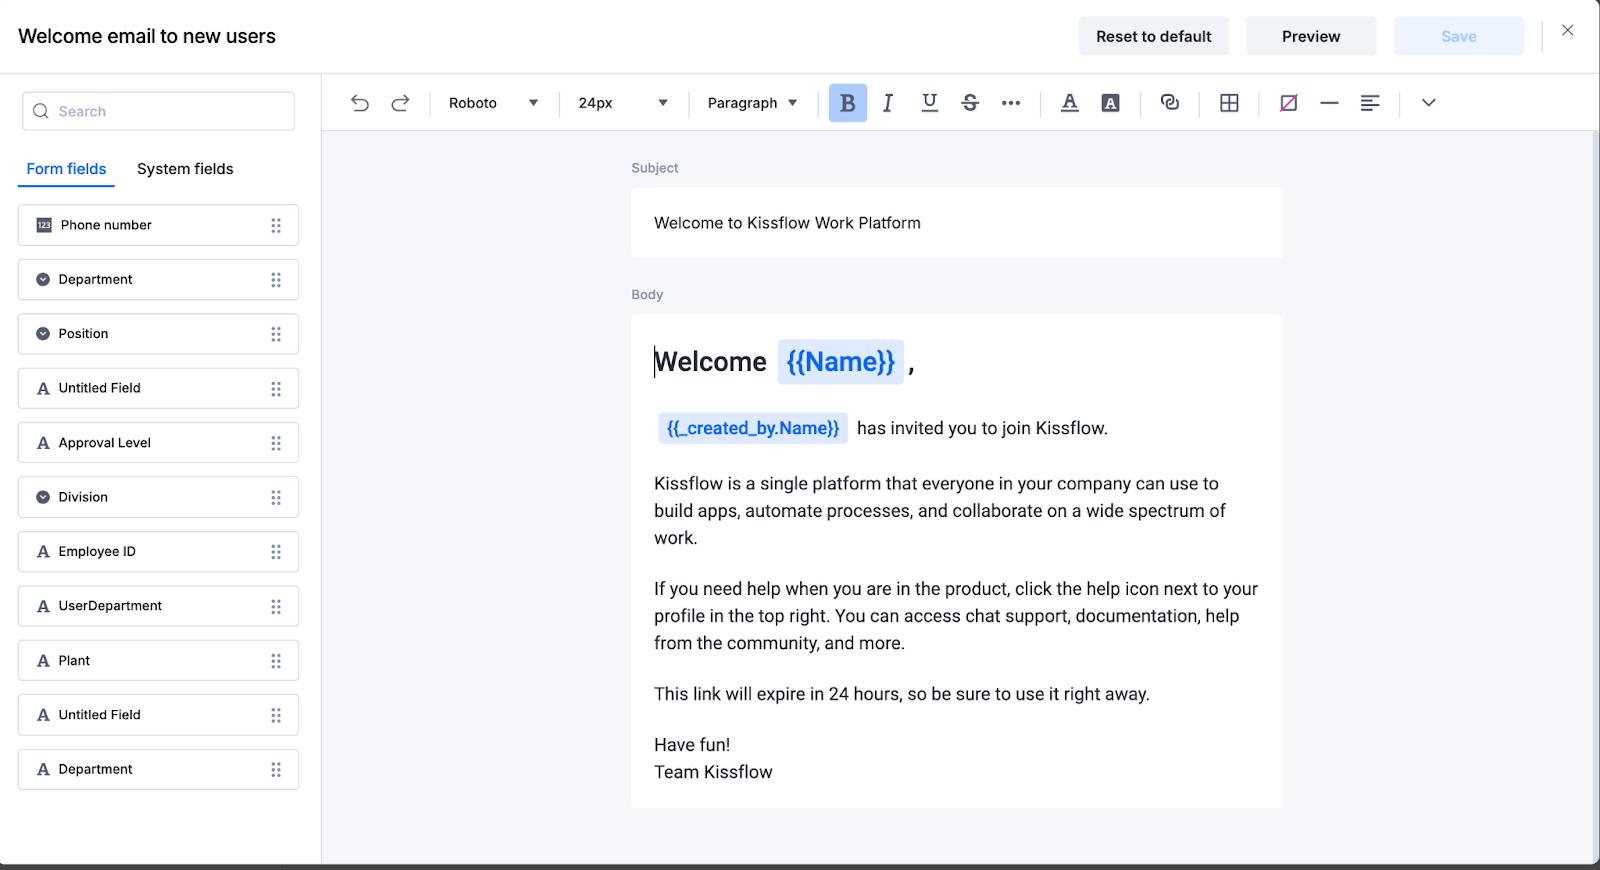
Under the General tab, click Edit on the welcome email or the resend-verification email.
-
Use the built-in editor to add, remove, or reformat text. Insert custom fields and system fields — like name, email, or phone number — to pull in user-specific information.
-
Click Preview to check your changes, then Save.
Note
Signature fields aren't supported in these email templates, default or customized.
Click Reset at any time to restore the original default content.
Header and footer
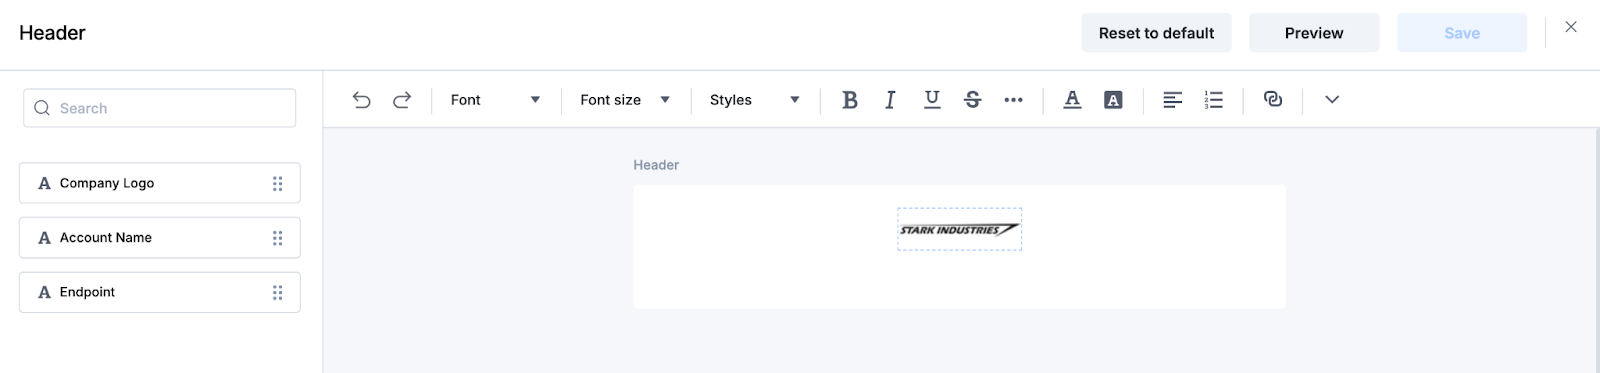
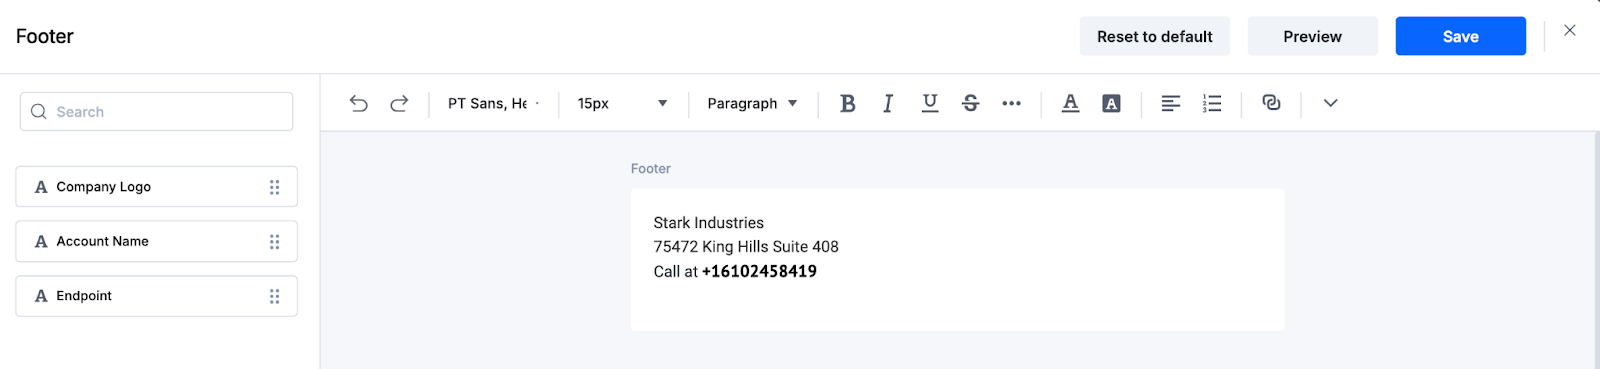
Under the Header and footer tab, edit or view the header and footer that appear on every email sent from your account — useful for consistent branding, contact information, or legal disclaimers.