

Backing up data to Google Cloud Storage (GCS)
Configure Kissflow to back up your account data to a Google Cloud Storage bucket, with service account authentication, ZIP size and encryption preferences, and data category selection.
Backing up data to Google Cloud Storage (GCS)
Note
Data backup is available on request. Contact Kissflow support to enable it on your account.
Google Cloud Storage is one of the storage destinations you can configure for account data backups, alongside Amazon S3, Google Drive, and Kissflow's own storage. Once configured, Kissflow exports your account data as JSON files, packages them into ZIP files, and uploads them directly to the GCS bucket you specify.
As a Super Admin, you can configure Kissflow to back up your account data to a Google Cloud Storage (GCS) bucket you control.
Prerequisites
Before you start configuration, grant these permissions in your Google Cloud IAM policy for the target bucket:
- storage.buckets.get — returns metadata for the bucket.
- storage.objects.create — allows Kissflow to write backup files to the bucket.
- storage.objects.get — allows Kissflow to read object metadata from the bucket.
You'll also need a service account key downloaded as a JSON file — you upload this file inside Kissflow to authenticate.
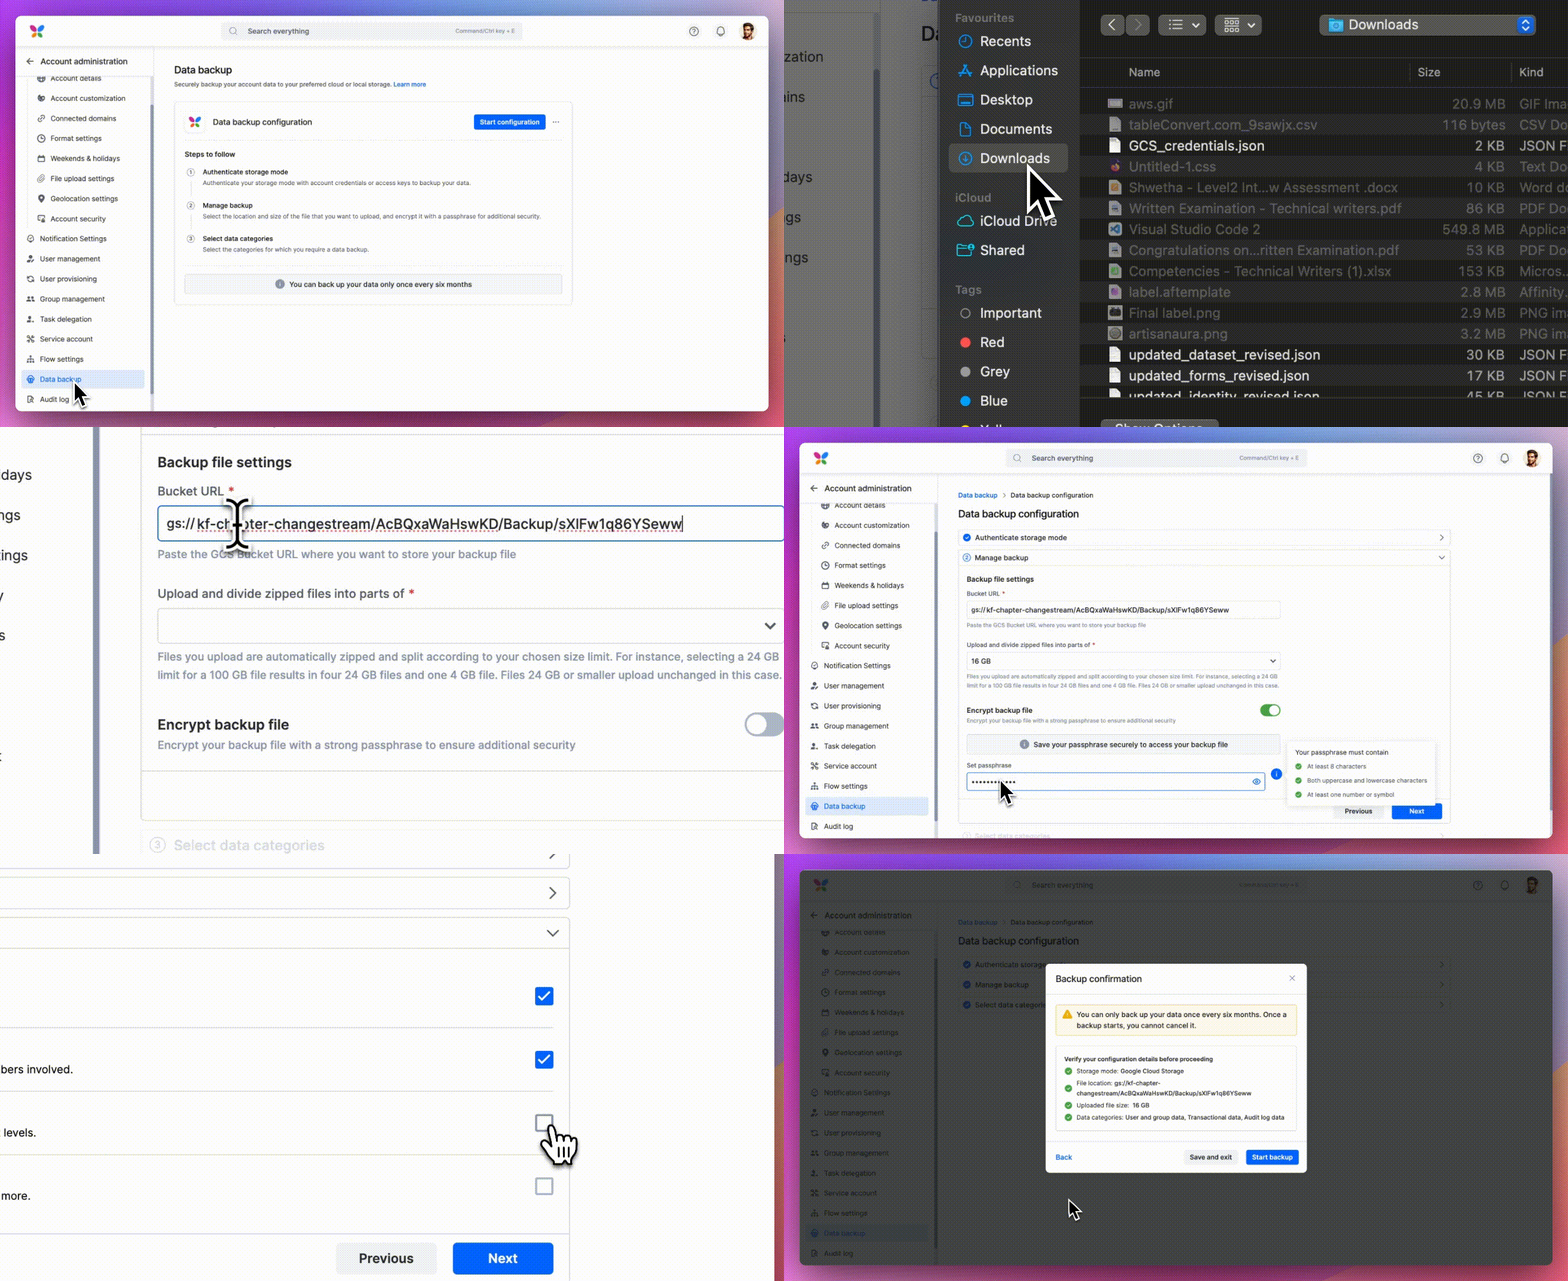
Start data backup configuration
-
Sign in to Kissflow.
-
Click your profile picture at the top right of the page, then click Account administration > Data backup.
-
Click Start configuration on the Data backup page.
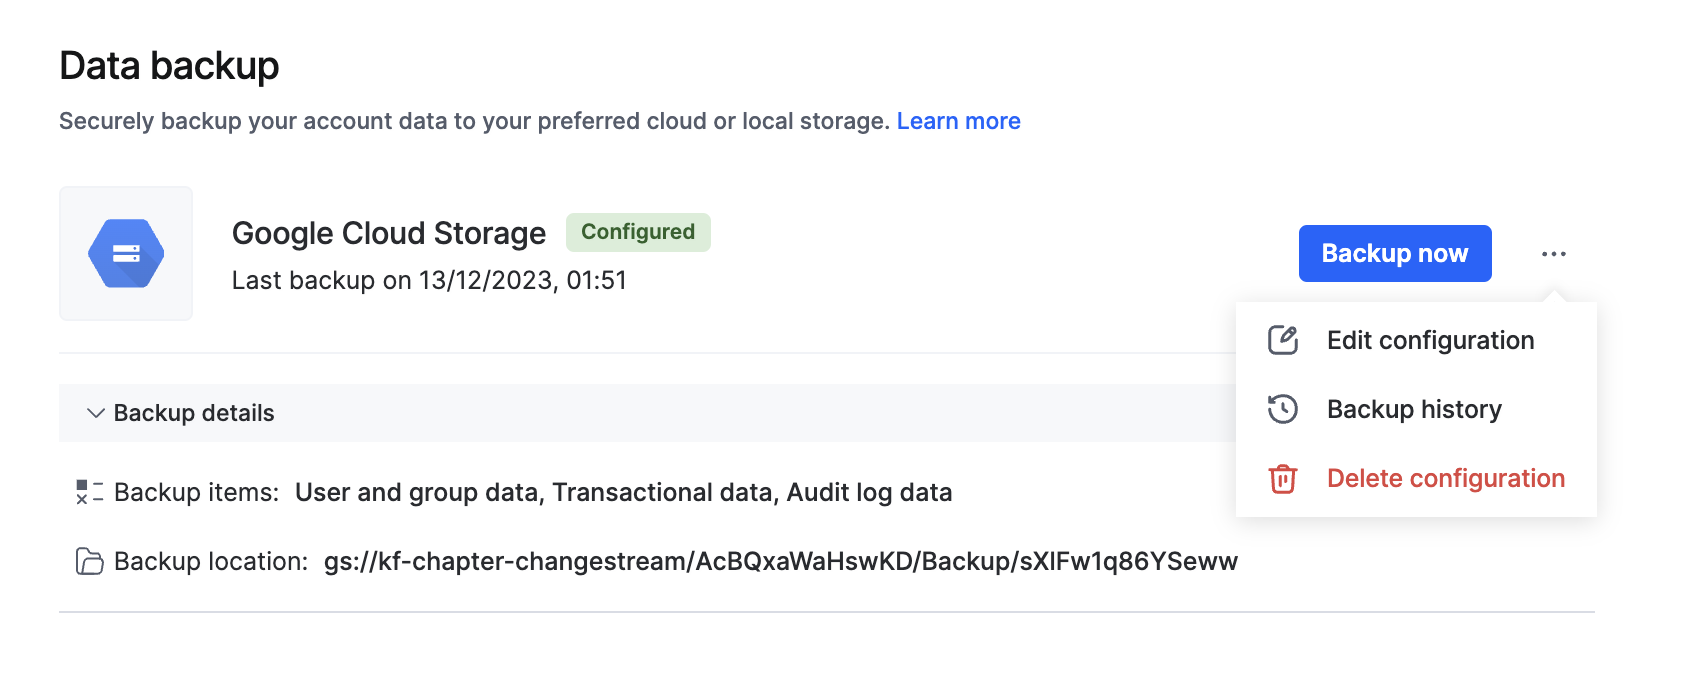
Configuration involves four steps: authenticating a storage mode, managing backup settings, selecting data categories, and reviewing your configuration before you start the backup.
Authenticate your GCS account
-
Select Google Cloud Storage as the storage mode from the dropdown.
-
Click Upload JSON and select the service account key file you downloaded from Google Cloud. This auto-populates your GCS service account keys.
-
Click Next.
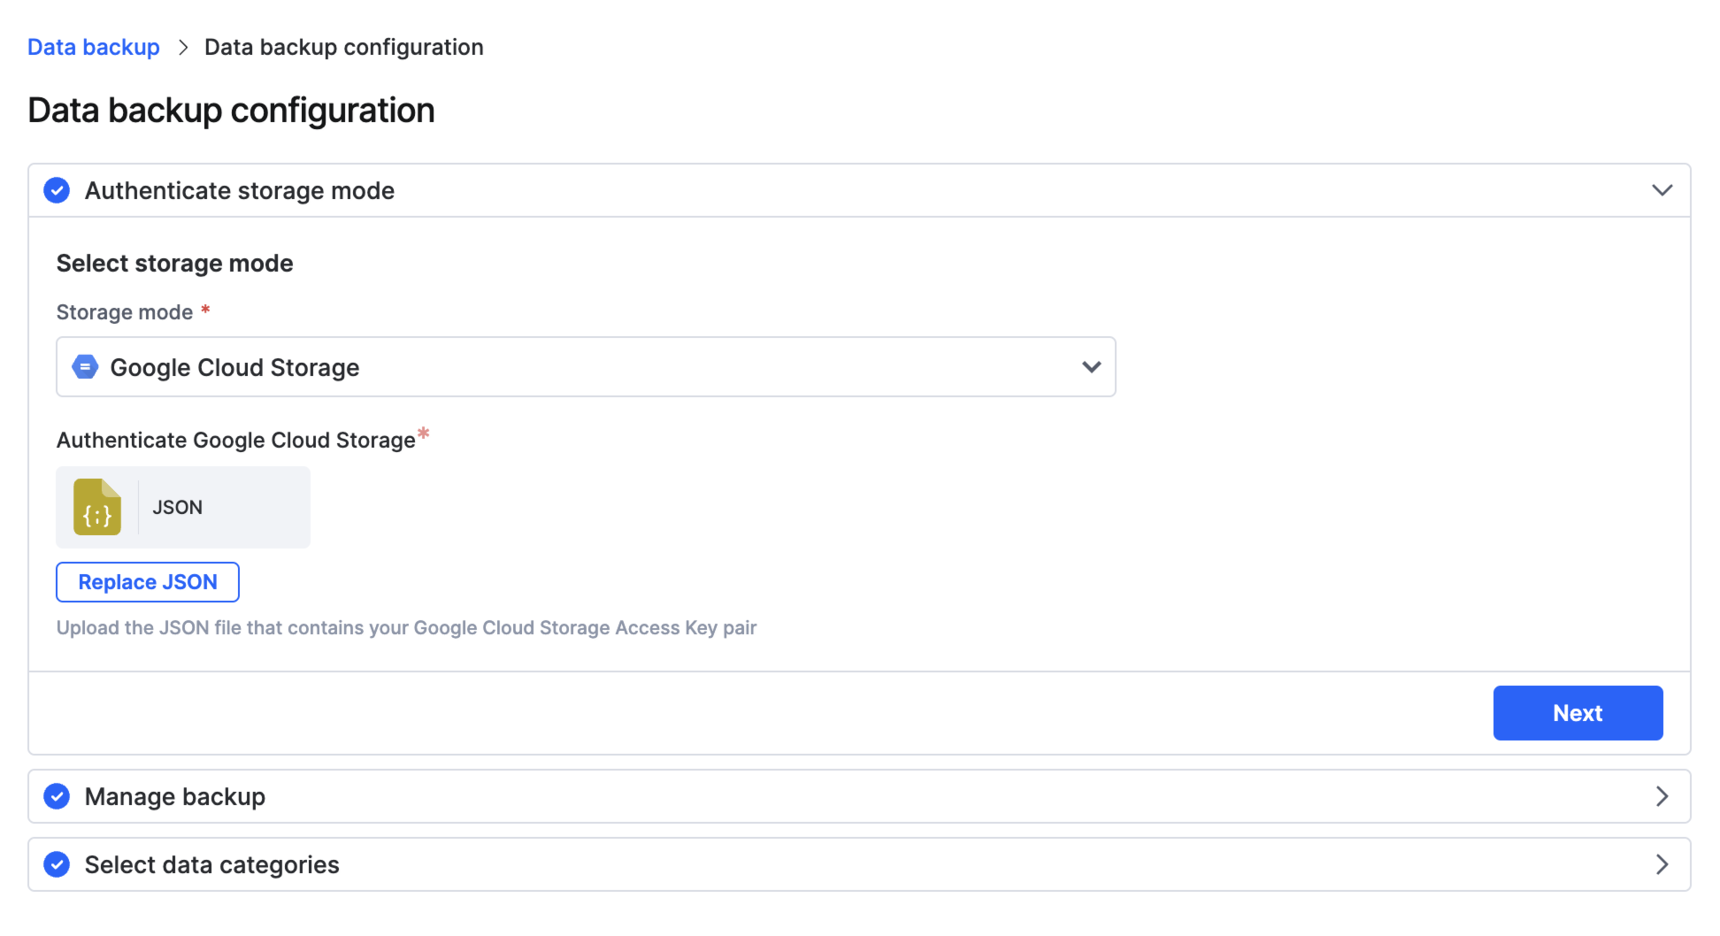
Note
To change your service account keys later, click Replace JSON and upload a new key file.
Manage backup settings
-
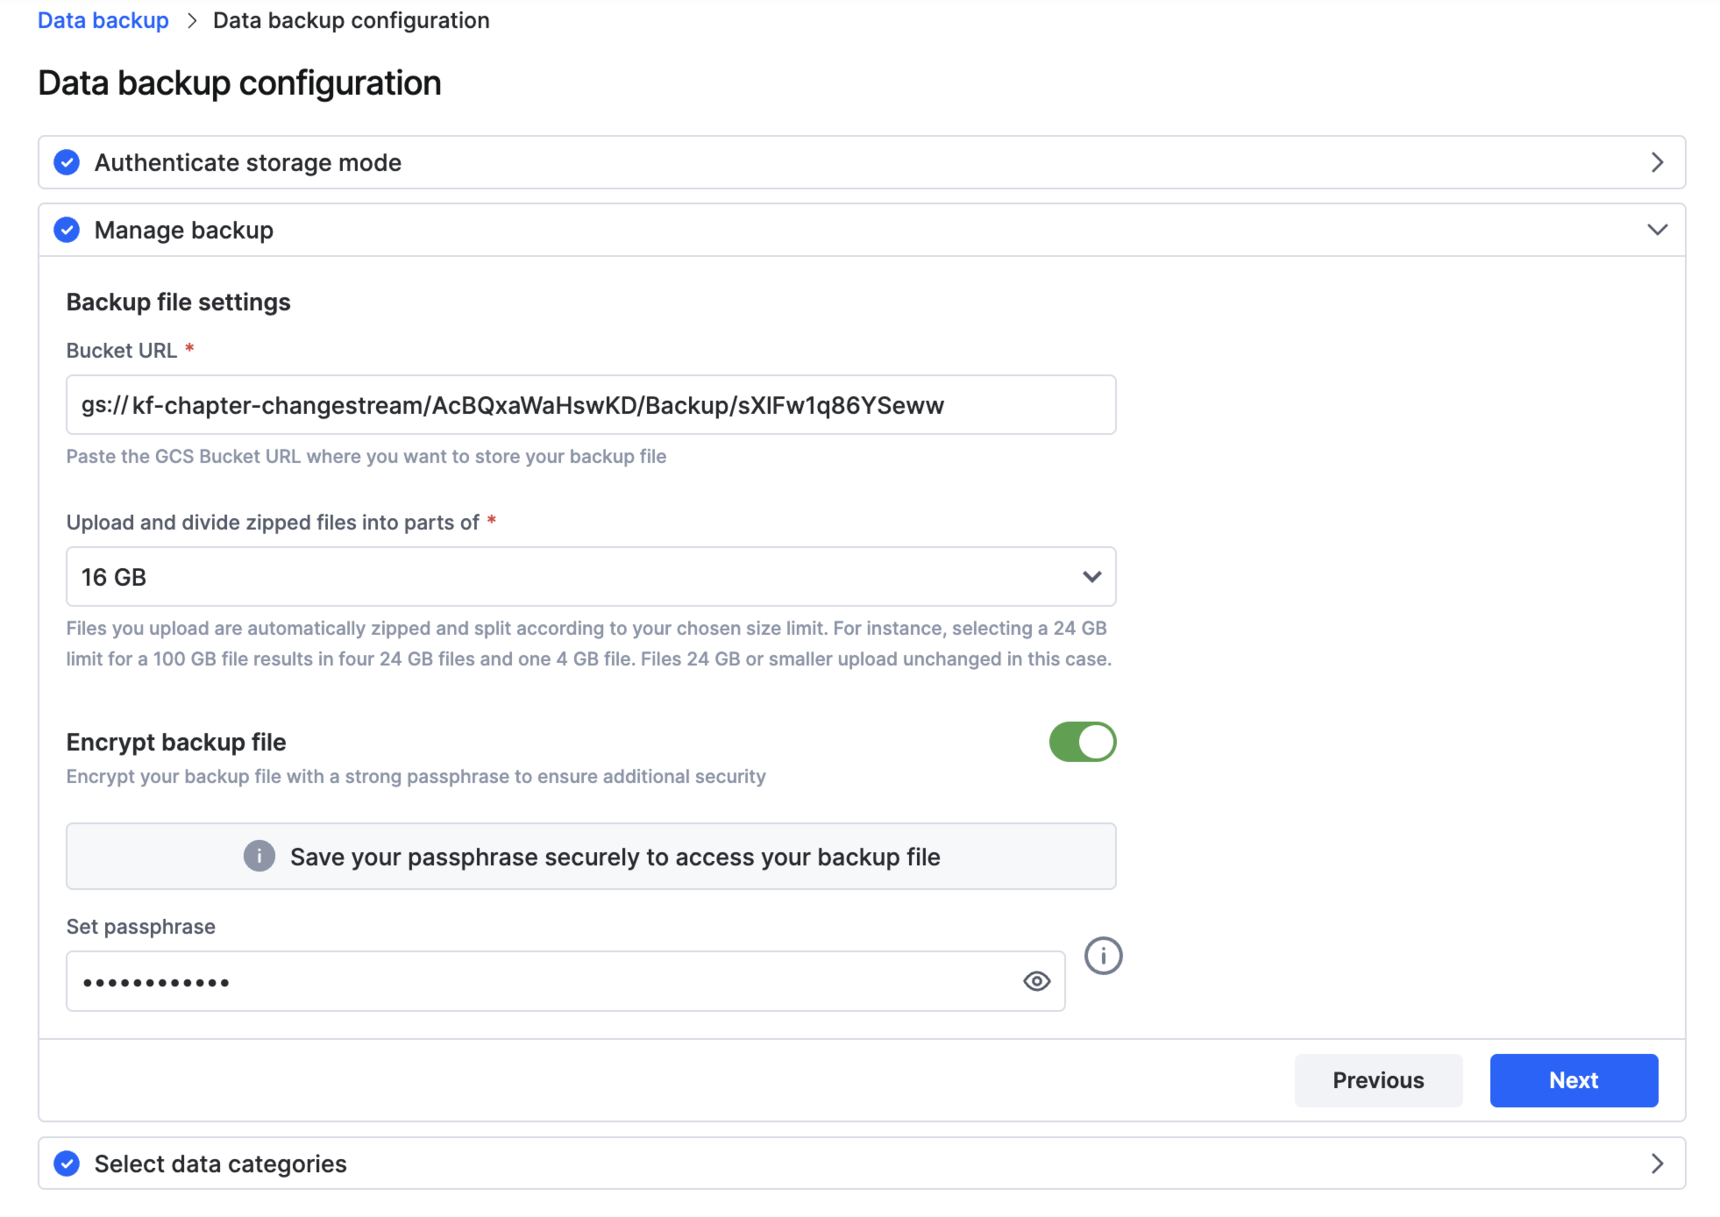
Bucket URI. Paste the GCS bucket URI where your backup files should be stored, in the form
gs://your-bucket-name. You can copy this from the bucket's details page in Google Cloud Console. -
Select ZIP file size. Choose 4 GB, 8 GB, 16 GB, or 24 GB. Files in your account are automatically zipped and split according to your chosen limit.
For example, a 24 GB limit applied to a 100 GB export produces four 24 GB files and one 4 GB file. Files 24 GB or smaller upload unchanged.
-
Encrypt backup file (optional). Switch on this toggle to add a passphrase that encrypts your backed-up files for additional security. Your passphrase must contain:
- At least eight characters.
- Both upper and lower case characters.
- At least one numeric character or symbol.
Important
Save your passphrase somewhere secure. You'll need it to decrypt and access your backed-up files later, and it can't be recovered if lost.
-
Click Save to continue to the next step, where you select your data categories.
Select data categories for backup
Choose one or more categories to include:
- User and group data — all account user and group data.
- Transactional data — flow item details such as status, comments, and assignees.
- Audit log data — the last year's audit logs at both the flow and account levels.
- Attachments — attachments across flows, including processes, boards, datasets, and apps.
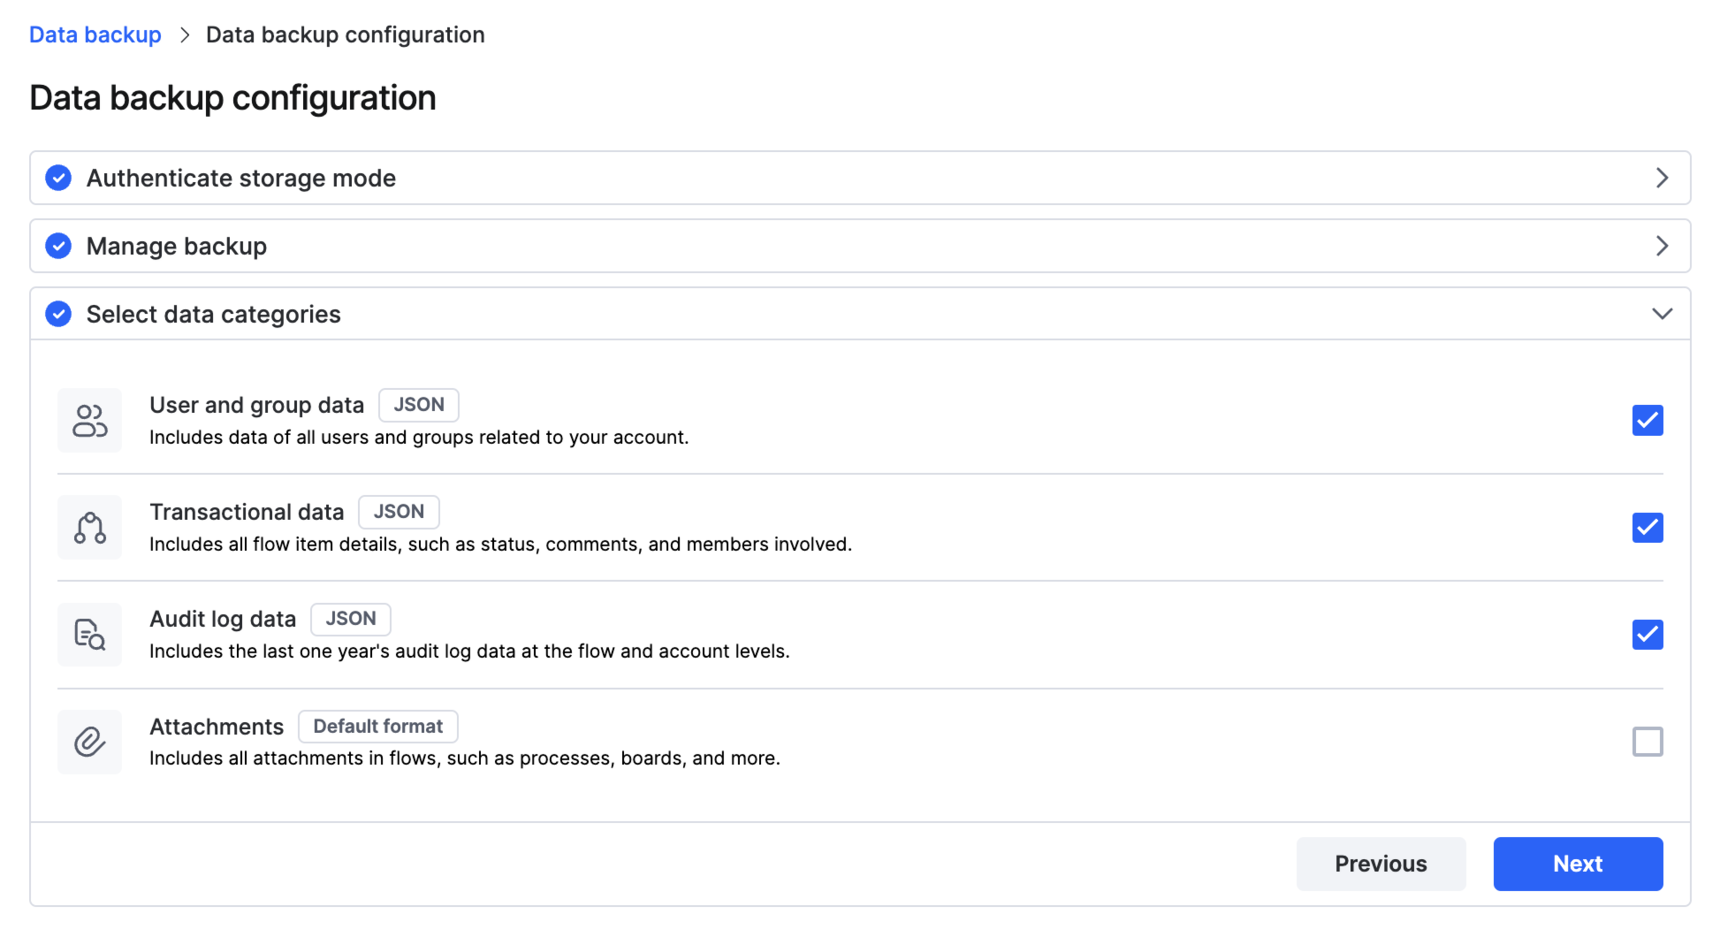
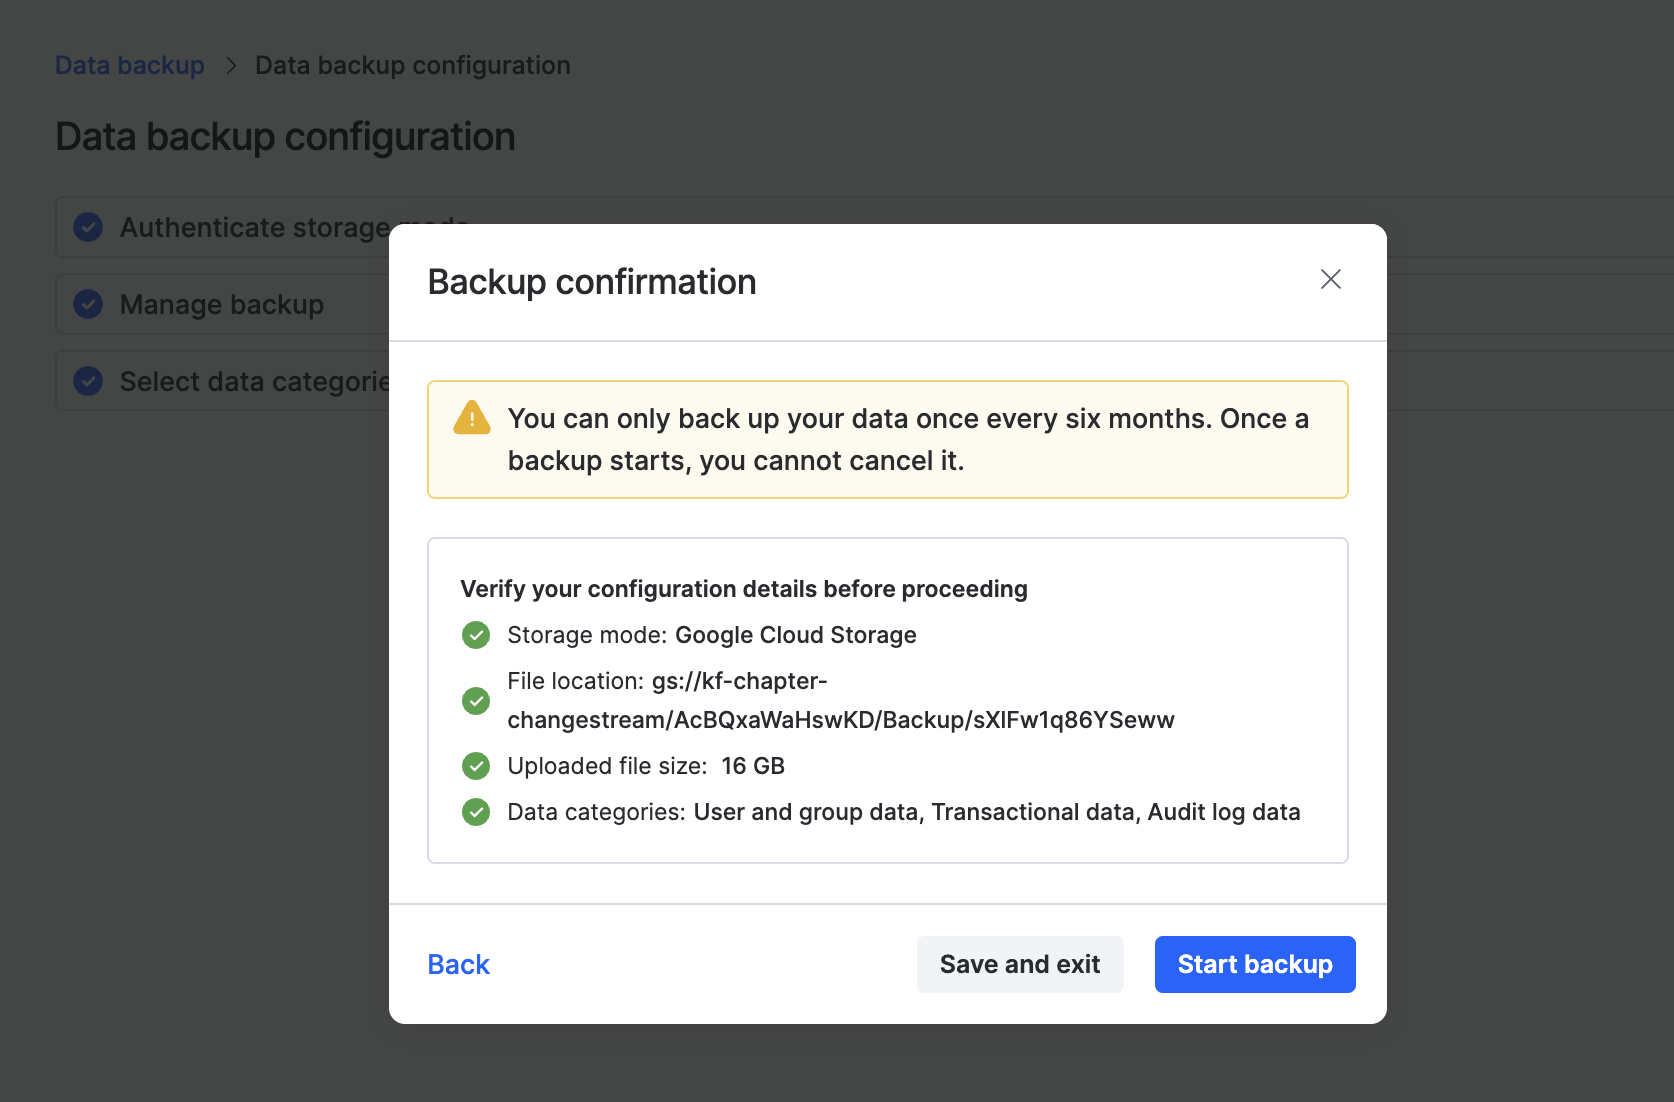
Select your categories and click Next. In the confirmation popup, verify your configuration details and click Start backup.
Note
Not ready to start? Save your configuration and exit — you can resume it later instead of running the backup immediately.
From the Data backup home page, you can also edit your configuration, delete it, or view your backup history.