Admin actions in a process
Access, search, edit, reassign, complete, and delete process items from the Administration section, and restore deleted items within 30 days.
Admin actions in a process
The Administration section of a process gives Process admins and Data admins a single place to view every item, edit its data, and step in when an item is stuck — by reassigning, completing, or deleting it. This article covers opening the Administration section and using each of these actions.
Open the Administration section
- Navigate to the process.
- Click the More options button (
 ) at the top right.
 - Select Administration.
This opens a list of every item in the process, showing:
- Title — the item's name, as configured in the process settings.
- Created at — when the item was first created.
- Created by — the person, or guest (if submitted via a public form), who created the item.
Click the Show/hide fields button (  ) to add other fields to the list or apply filters.
Search for items
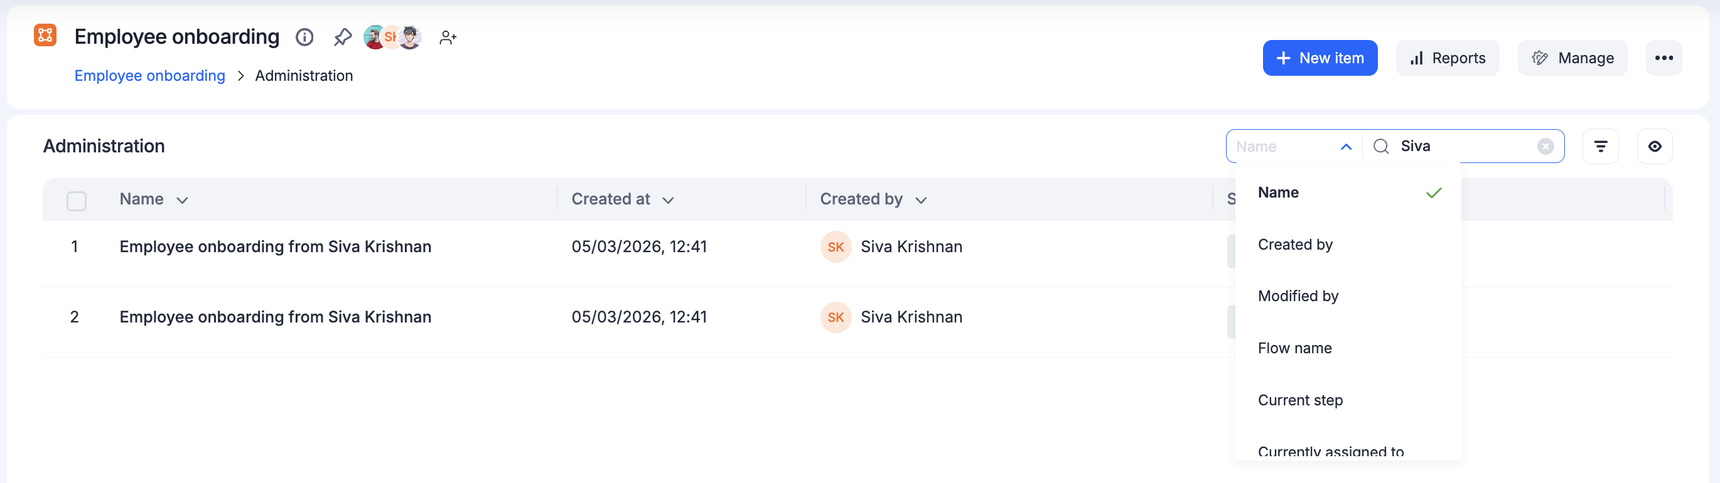
Use the search bar to find items quickly. Its dropdown lists every field in the process — select one, then enter a value to list only the items whose selected field matches it.
Edit an item's fields
You can view and edit any field on an item, or reassign it to someone else.
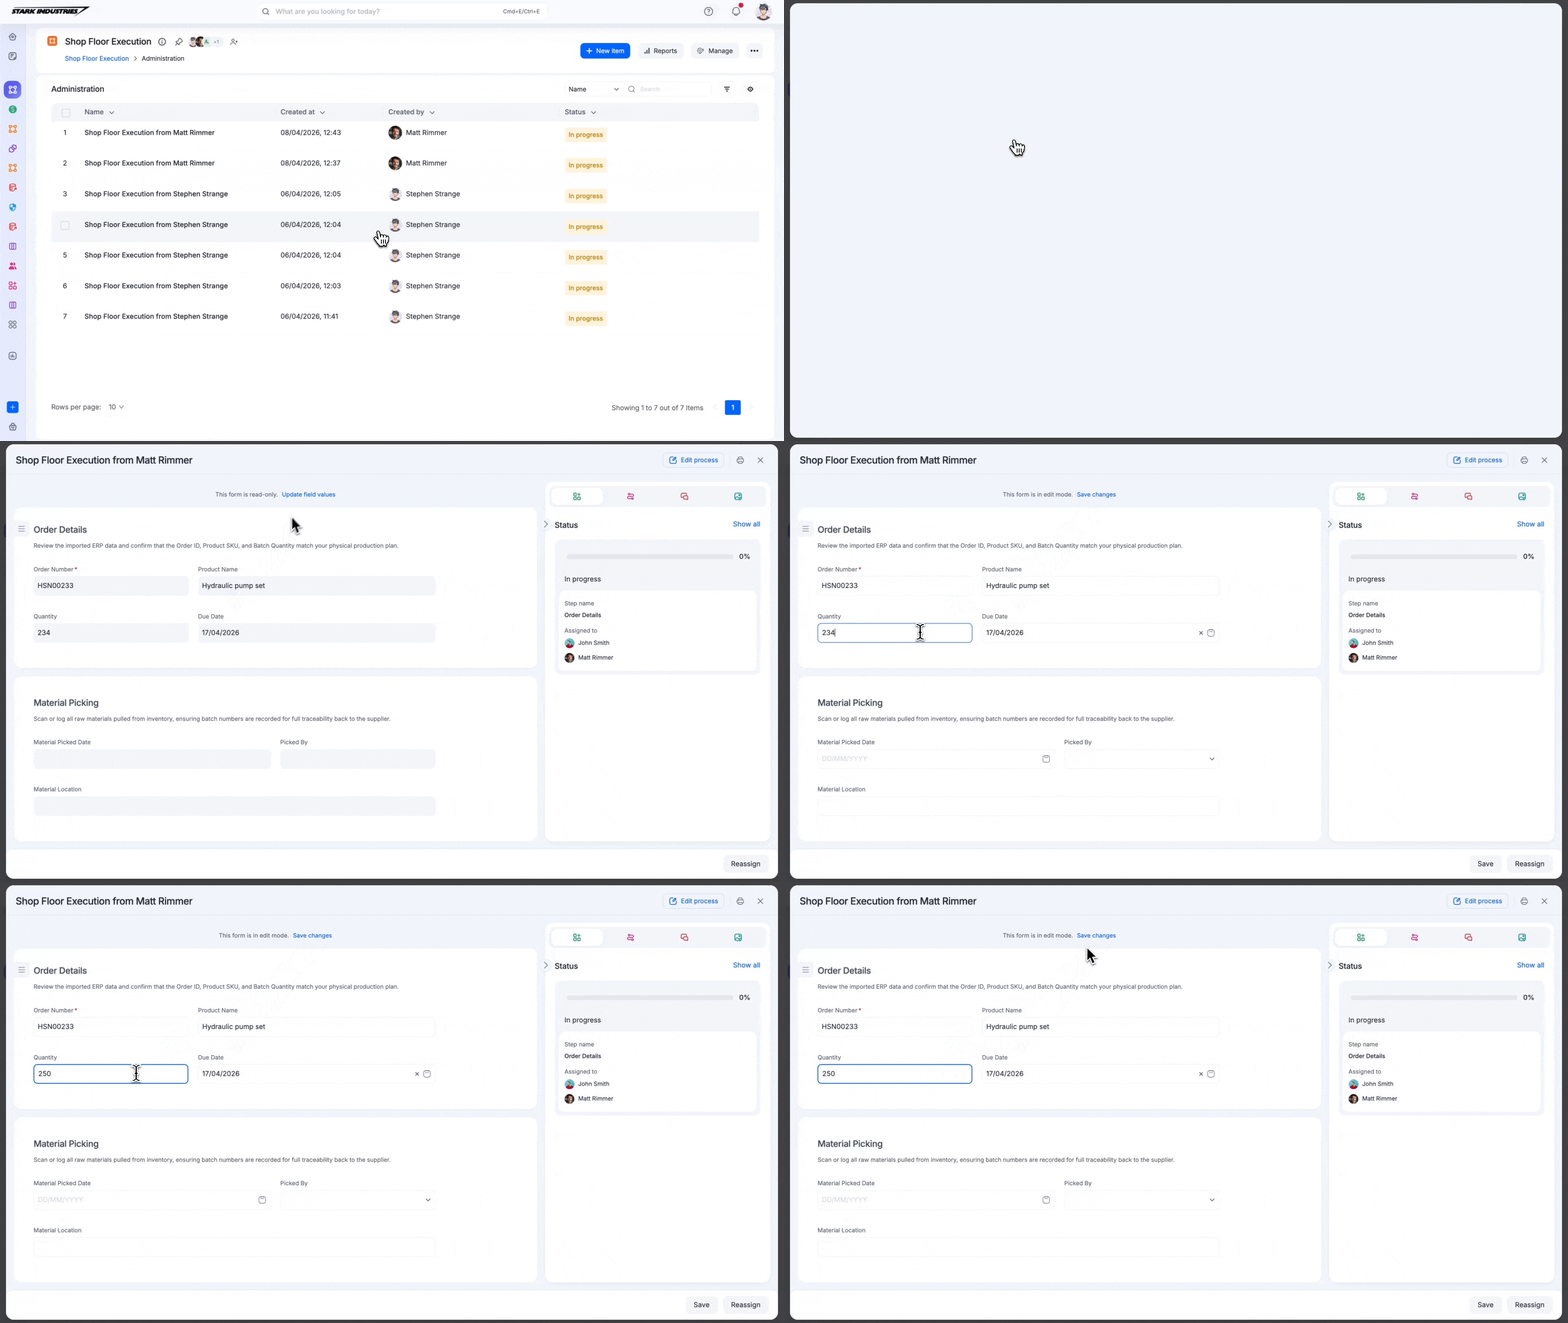
- Open the item.
- Click Update field values at the top of the item form.
- Make your edits.
- Click Save changes.
Note
All of these actions are recorded in the process audit log.
Perform bulk actions
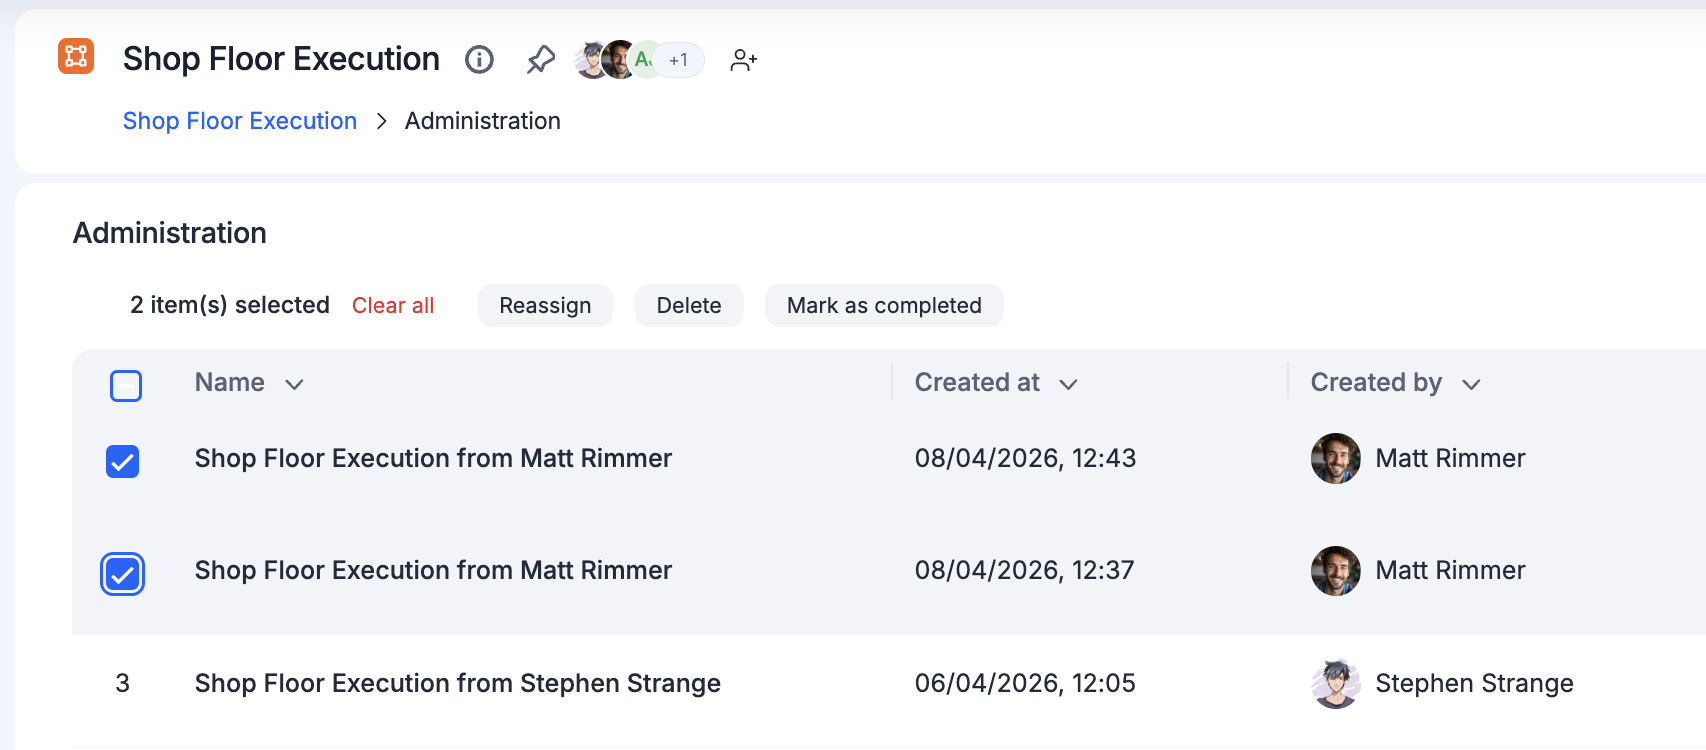
From the Administration section, you can reassign, mark complete, or delete several items at once — up to 100 items in a single batch.
- Navigate to the process and click the More options button ( ) > Administration.
- Select the items you want to act on.
Reassign items
If an item sits at a step too long — because the assigned person is unavailable or unable to act — you can reassign it to yourself or another user with the right permissions to move it forward.
Note
An item's initiator can also reassign it, depending on the permissions granted to them.
- Select one or more items.
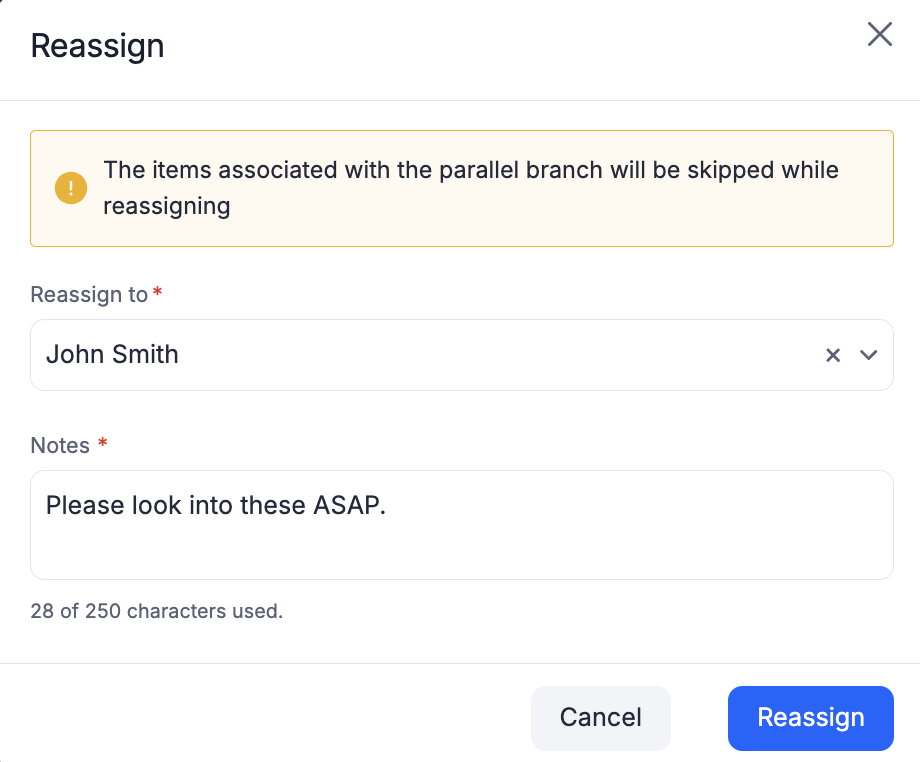
- Click Reassign.
Important
Reassigning an item with more than one assignee invalidates the previous assignment entirely — it doesn't just add the new assignee alongside the others. For example, if you, John, and Linda are all assigned to an item and you reassign it to Abraham, Abraham becomes the sole assignee. You, John, and Linda are all removed automatically. This is different from how reassignment works for a process member, where the reassigning member is simply replaced by the new assignee and the rest stay on the item.
Items that are already completed, rejected, or withdrawn are skipped during reassignment — only items in In progress status are reassigned. Skipped items are prefixed with a yellow exclamation mark so you can identify them.
Note
Items inside parallel branches cannot be reassigned.
Mark items as completed
Select one or more items and click Mark as completed.
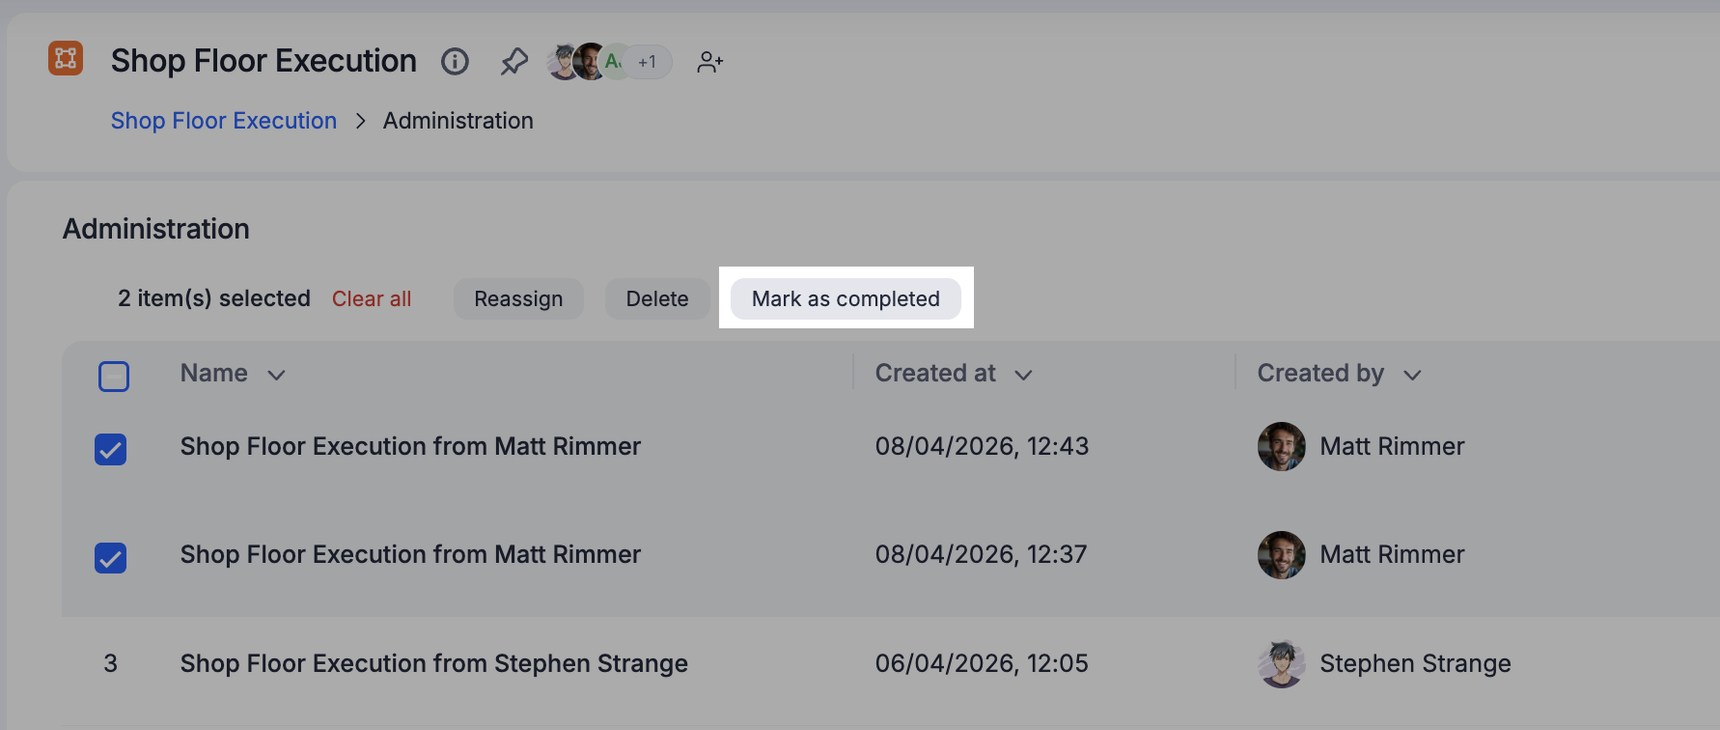
Marking an item complete advances it straight to the end of the workflow, skipping every remaining step. This is useful when an item's assignee is unavailable and you need the item closed out immediately.
Delete and restore items
Select one or more items and click Delete.
Note
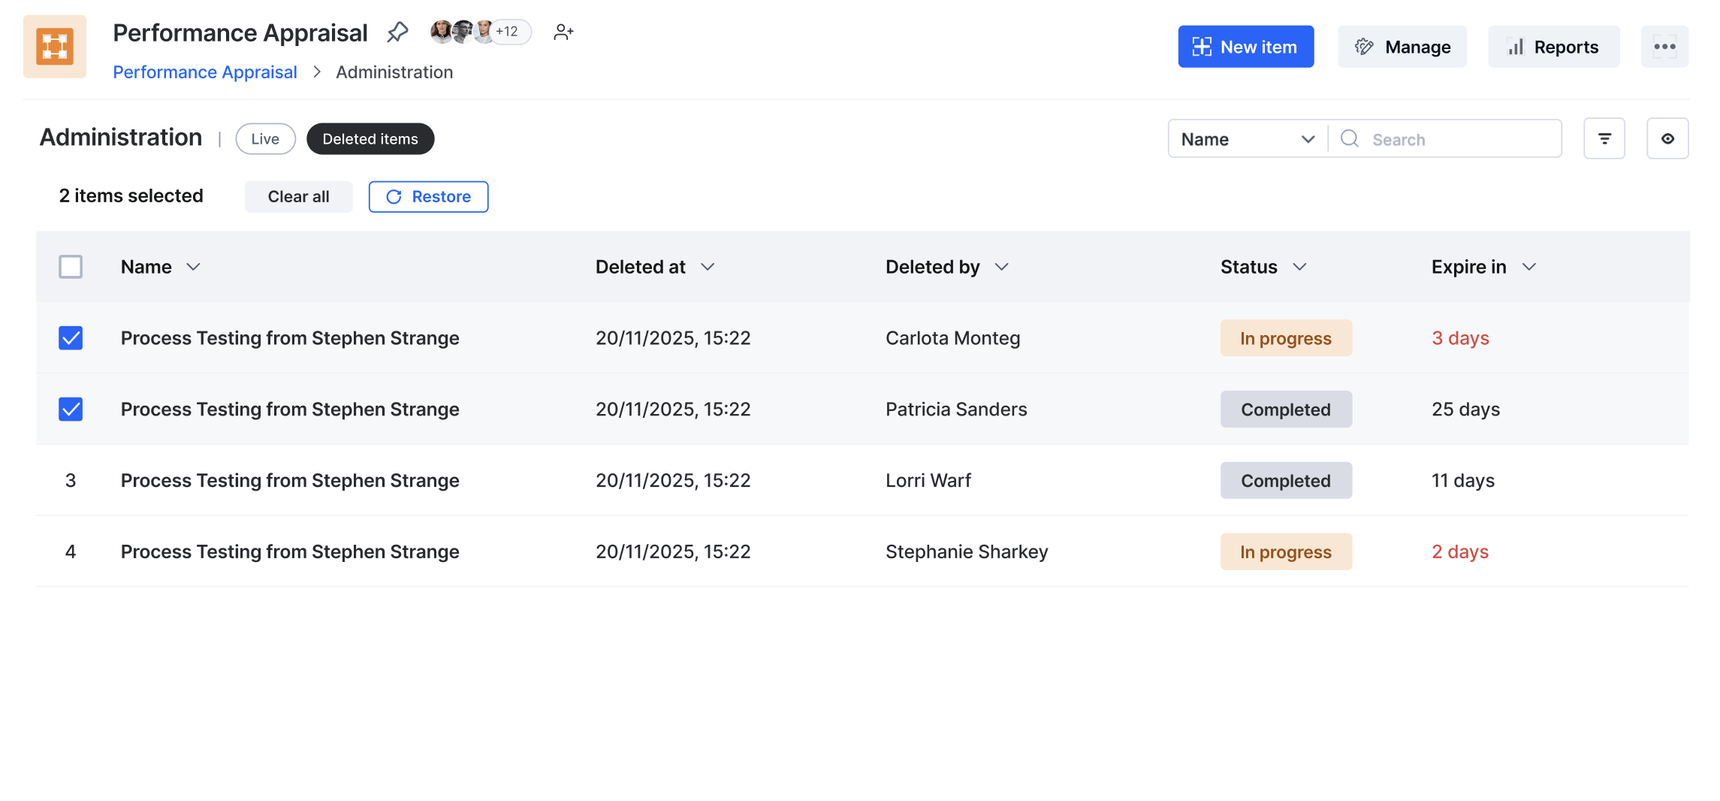
Deleted items can be restored within 30 days of deletion. After that, they're permanently deleted.
To restore a deleted item:
- Click the Deleted items tab at the top of the process.
- Select the items you want to restore.
- Click Restore.