
How-to
Short answer: Drag the form table onto the template. The editor adds the loop that repeats the table once per row. Inside it, insert each column as {{ Table_Name.Field }}.
Why it happens
- A form table is a list of rows, so the template needs a loop to print every row.
- "Action failed due to syntax error in document template" usually means a loop or condition tag was typed wrong, left unclosed, or edited.
How to fix it
-
Open the document template editor.
-
Drag the form table onto the template. The editor adds a line such as
{% for Line_Items in Table__Line_Items %}above it and{% endfor %}below it. Keep both lines as written.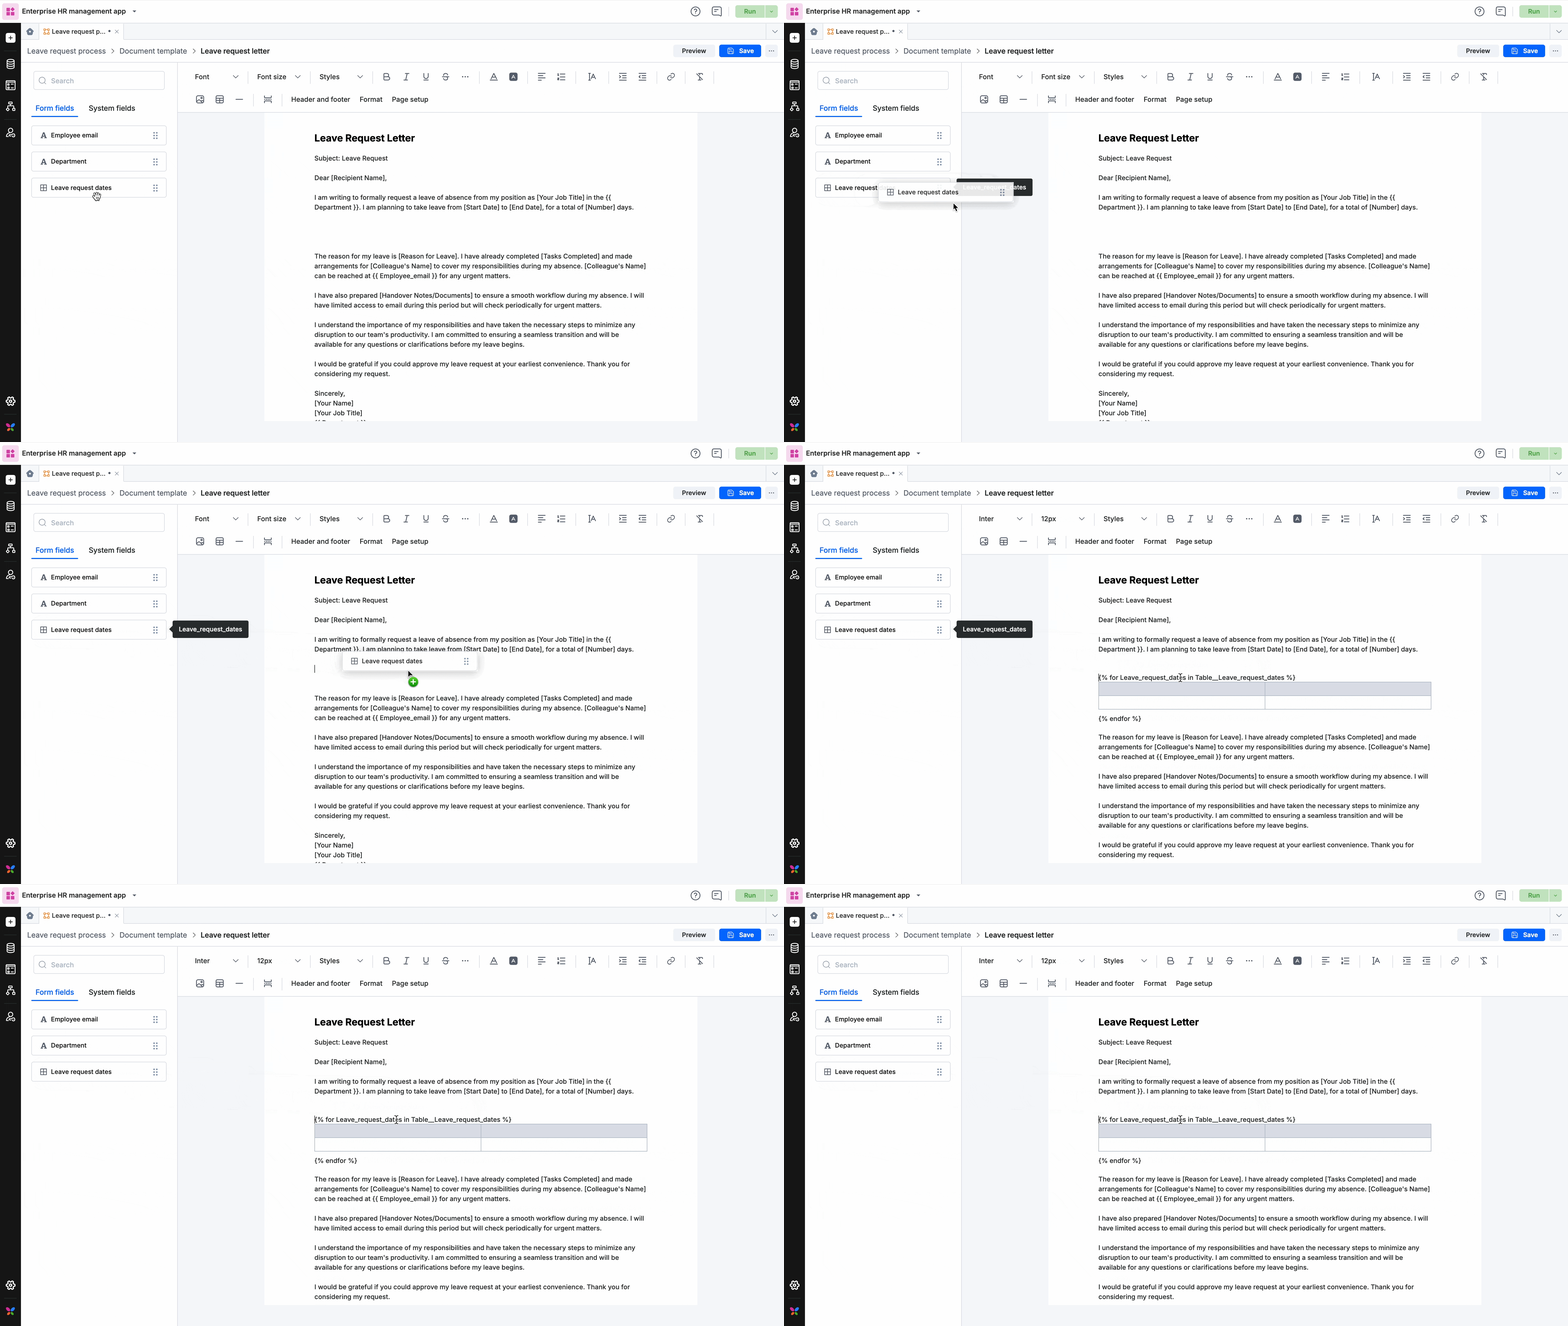
-
Name the column headers.
-
In the row, type double curly braces to insert each column, for example
{{ Line_Items.Quantity }}. You can't drag a field into a table cell. -
Click Preview to check the output.
If you get the syntax error:
- Make sure every
{% for %}has its{% endfor %}, and every{% if %}has its{% endif %}. - If the loop lines were deleted or changed, drop the table in again.
- Check that bold or color isn't applied to only part of a tag.
See finding a syntax error for the full checklist.
Tip
The printed form always shows the account logo. For a process-specific logo, add it as an image in the template's header.